# Managing sheets
# Creating and deleting sheets
In every Space/Project in Jira there is at least one Sheet, which by default shows all Work items of the Space/Project. You can change this Sheet and you can create as many more Sheets as you like. Sheets are used for all sorts of purposes, such as project, portfolio, and asset management, roadmap prioritisation, backlog maintenance, sprint planning, requests triage, task tracking, managing time sheets, etc. Whatever it is you do in Jira today, you might be able to do it quicker in a Sheet. Depending on the use case you will want to set up multiple Sheets with different sheet scopes, table columns, sorting etc.
# Creating new sheets
To create a new Sheet, open the Sheets menu by clicking on the
Alternatively, open the
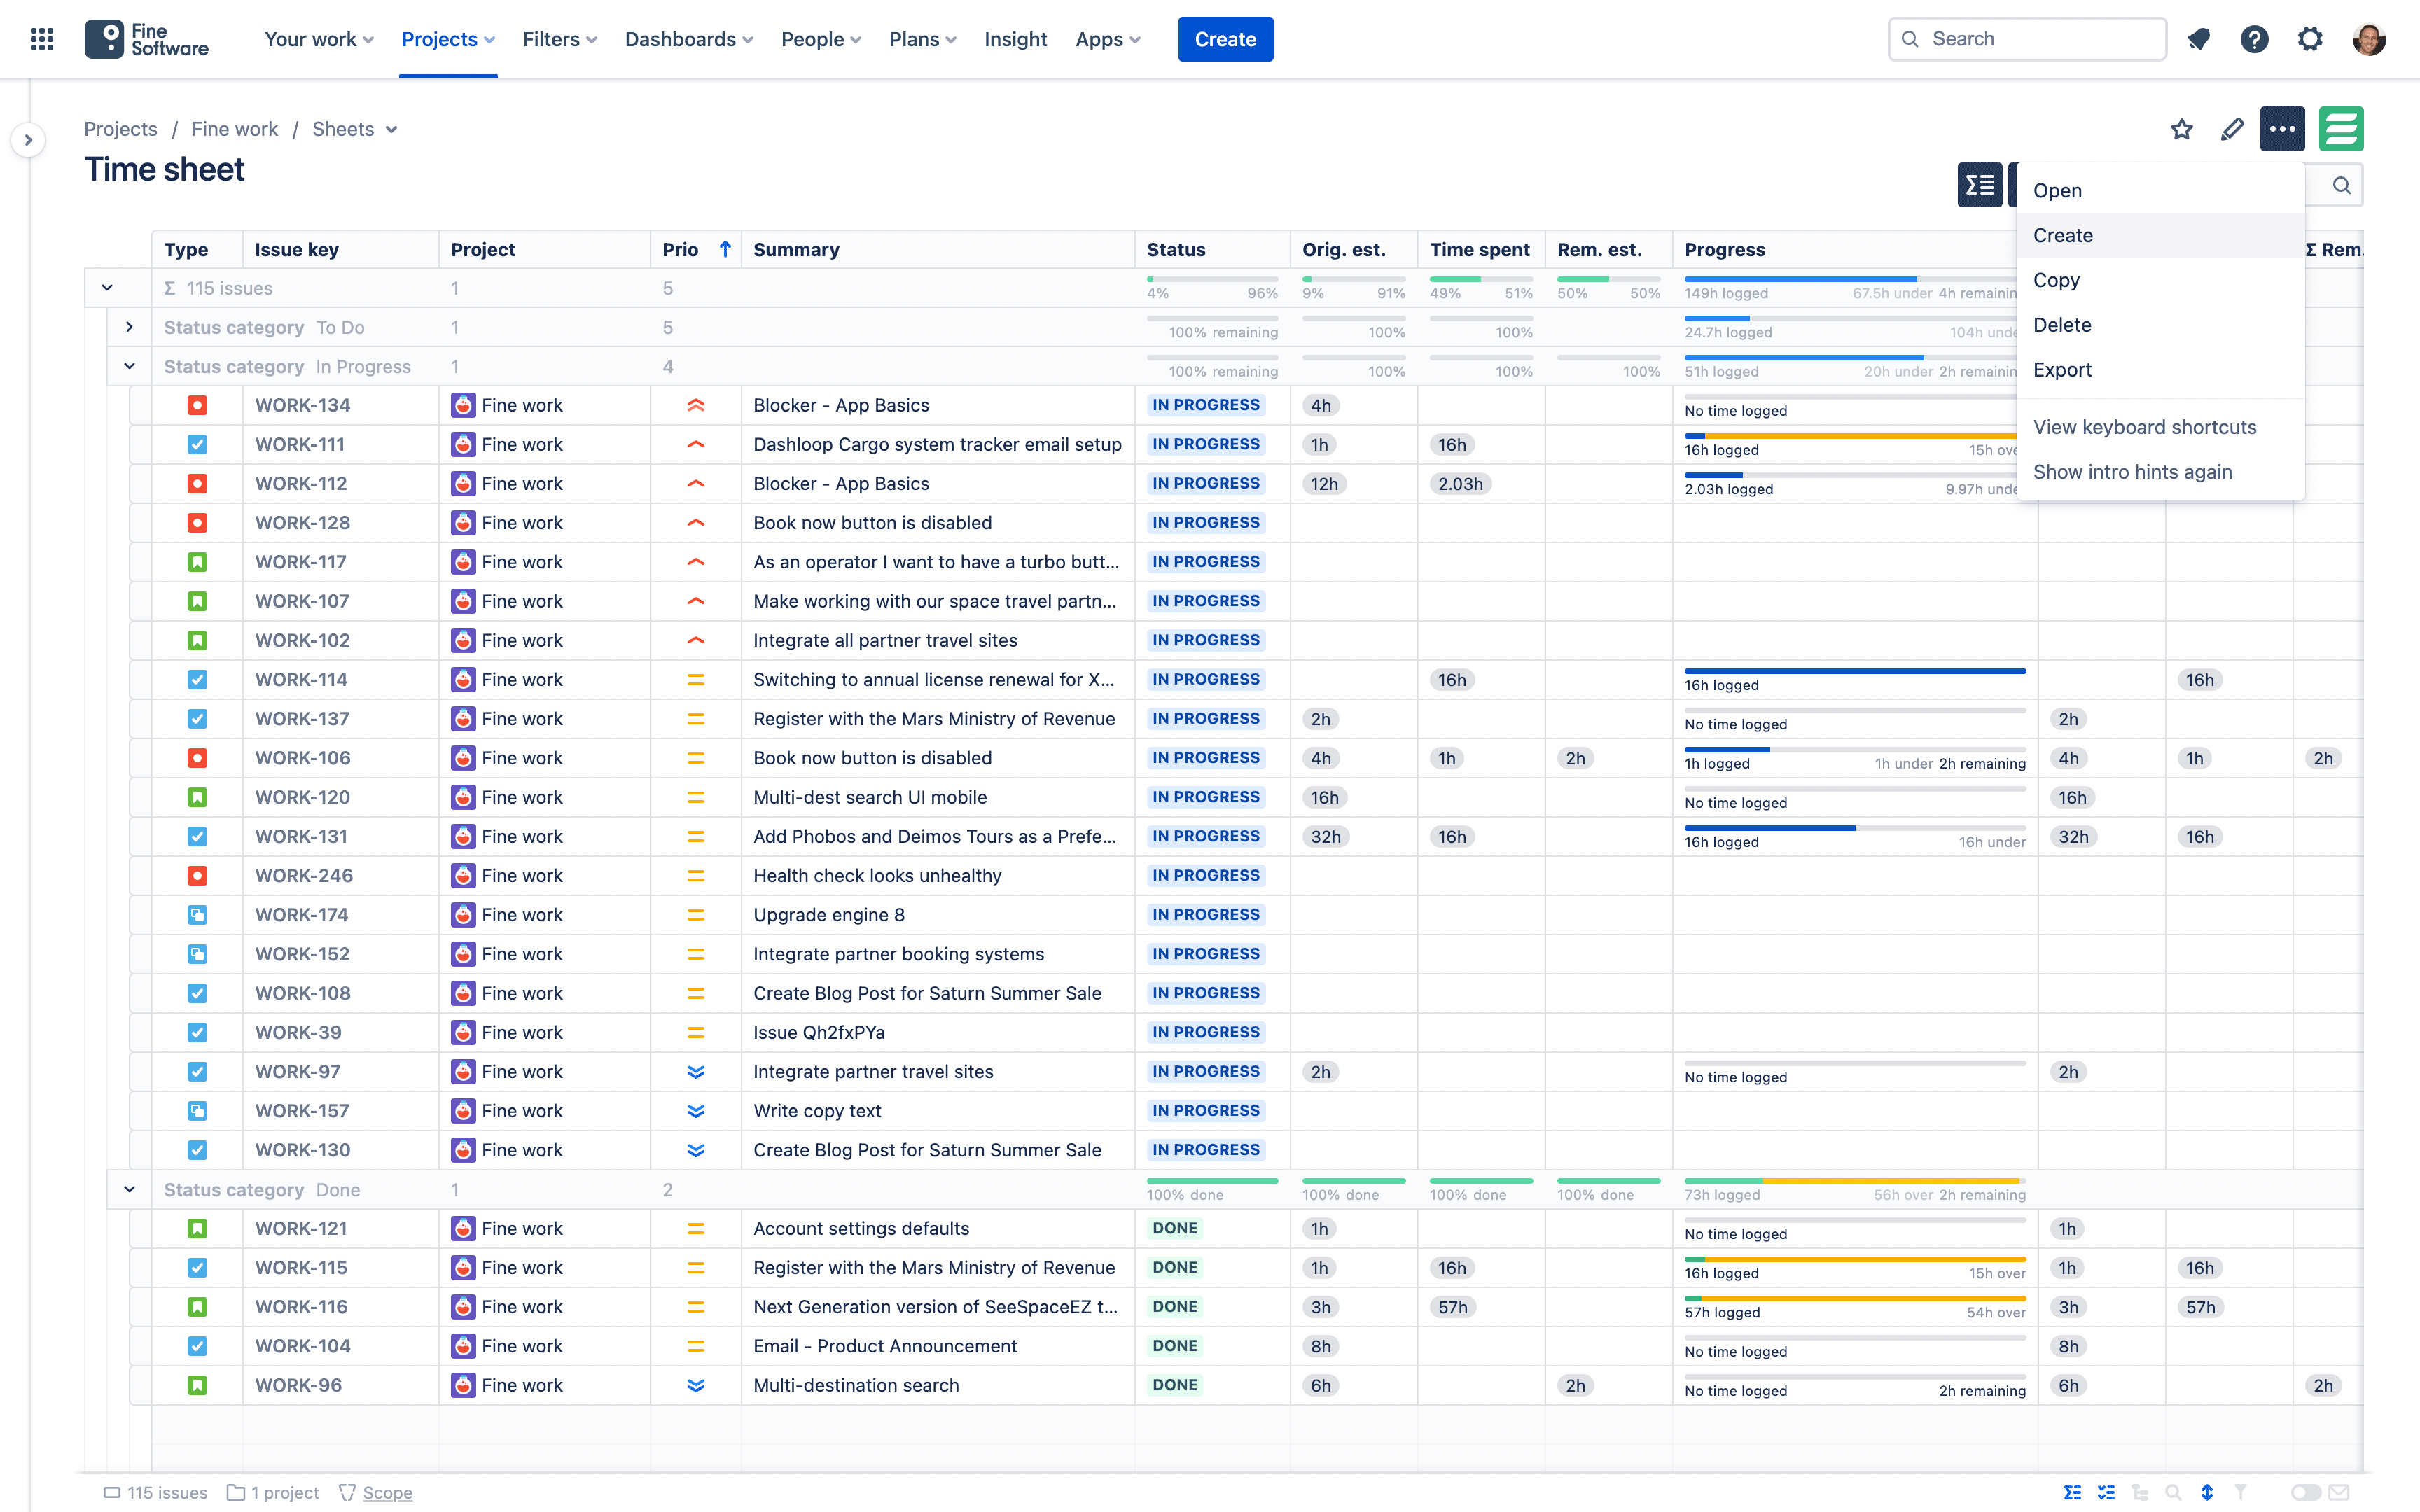
# Copying sheets
You can create a new Sheet by duplicating an existing one. Open the
In the dialog that appears, choose the Space/Project where you would like the new Sheet to be located in. v2.5.1
In the next step, you’ll probably want to enter a new title for the new Sheet. Save it by clicking the Save button at the top right.
# Creating sheets from a filter v2.8.0
You can also create a new Sheet from an existing Jira Filter (opens new window) accessible to you, or from a search result saved as a new Filter. Simply create a new Sheet and when defining its scope, choose the relevant Filter.
This will tie the Sheet to the associated Filter's search query, but not to the Filter's column layout, as Jira advanced search and JXL offer different sets of columns. Add and arrange columns in your Sheet to your liking and save it by clicking the Save button at the top right.
# Moving sheets
You can move a Sheet from one Space/Project to another. Open the
In the dialog that appears, choose the Space/Project where you would like the Sheet to be located in. v2.5.1
In the next step, save the Sheet in its new location by clicking the Save button at the top right. Optionally, navigate back to the origin Space/Project and delete the old Sheet there by opening the
# Deleting sheets
To delete a Sheet, open the
# Editing sheets
Sheets, like Boards and Queues, are named entities that can be edited, i.e. configured. To edit a Sheet (as opposed to the Work items inside the Sheet), click the
# Sheet title
You need to edit a Sheet for this (click
Change a Sheet’s title by clicking on the title field at the upper left corner of the page, and entering a new title. Click the Save button at the top right to commit your changes.
# Sheet folders v3.0.5
You need to edit a Sheet for this (click
Sheets can be organised in folders within Spaces/Projects. When editing the sheet title, you can type two forward slashes // to create and nest the Sheet in a folder. For example, a title "Folder 1 // Folder 2 // Sheet A" will nest the Sheet in a folder "Folder 1", sub-folder "Folder 2", and title it "Sheet A".
# Sheet description v3.1.1
You can optionally add a description to your Sheets to provide others with context, e.g. what the Sheet contains, who its audience is, how it should be used as part of your business processes, etc.
To view or add a sheet description, open the sheet details dialog by clicking the
# Sheet scope
You need to edit a Sheet for this (click
Change a Sheet’s scope using the scope composer bar above the table. Choose between JQL, Filter, Space/Project, and Board.
In JQL mode, you can edit or enter a new query statement (Jira Query Language (opens new window)).
In Filter mode, you can pick one of the Filters (opens new window) available to you in your Jira site. v2.8.0
In Space/Project and Board modes, you can pick one of the Spaces/Projects or Boards available to you in your Jira site. v5.1.0
To see the changes reflected in the table below, click the Apply button or press ⌘ Cmd ↲ Enter (macOS) or ⌃ Ctrl ↲ Enter (Windows, Linux, etc.) for a JQL query.
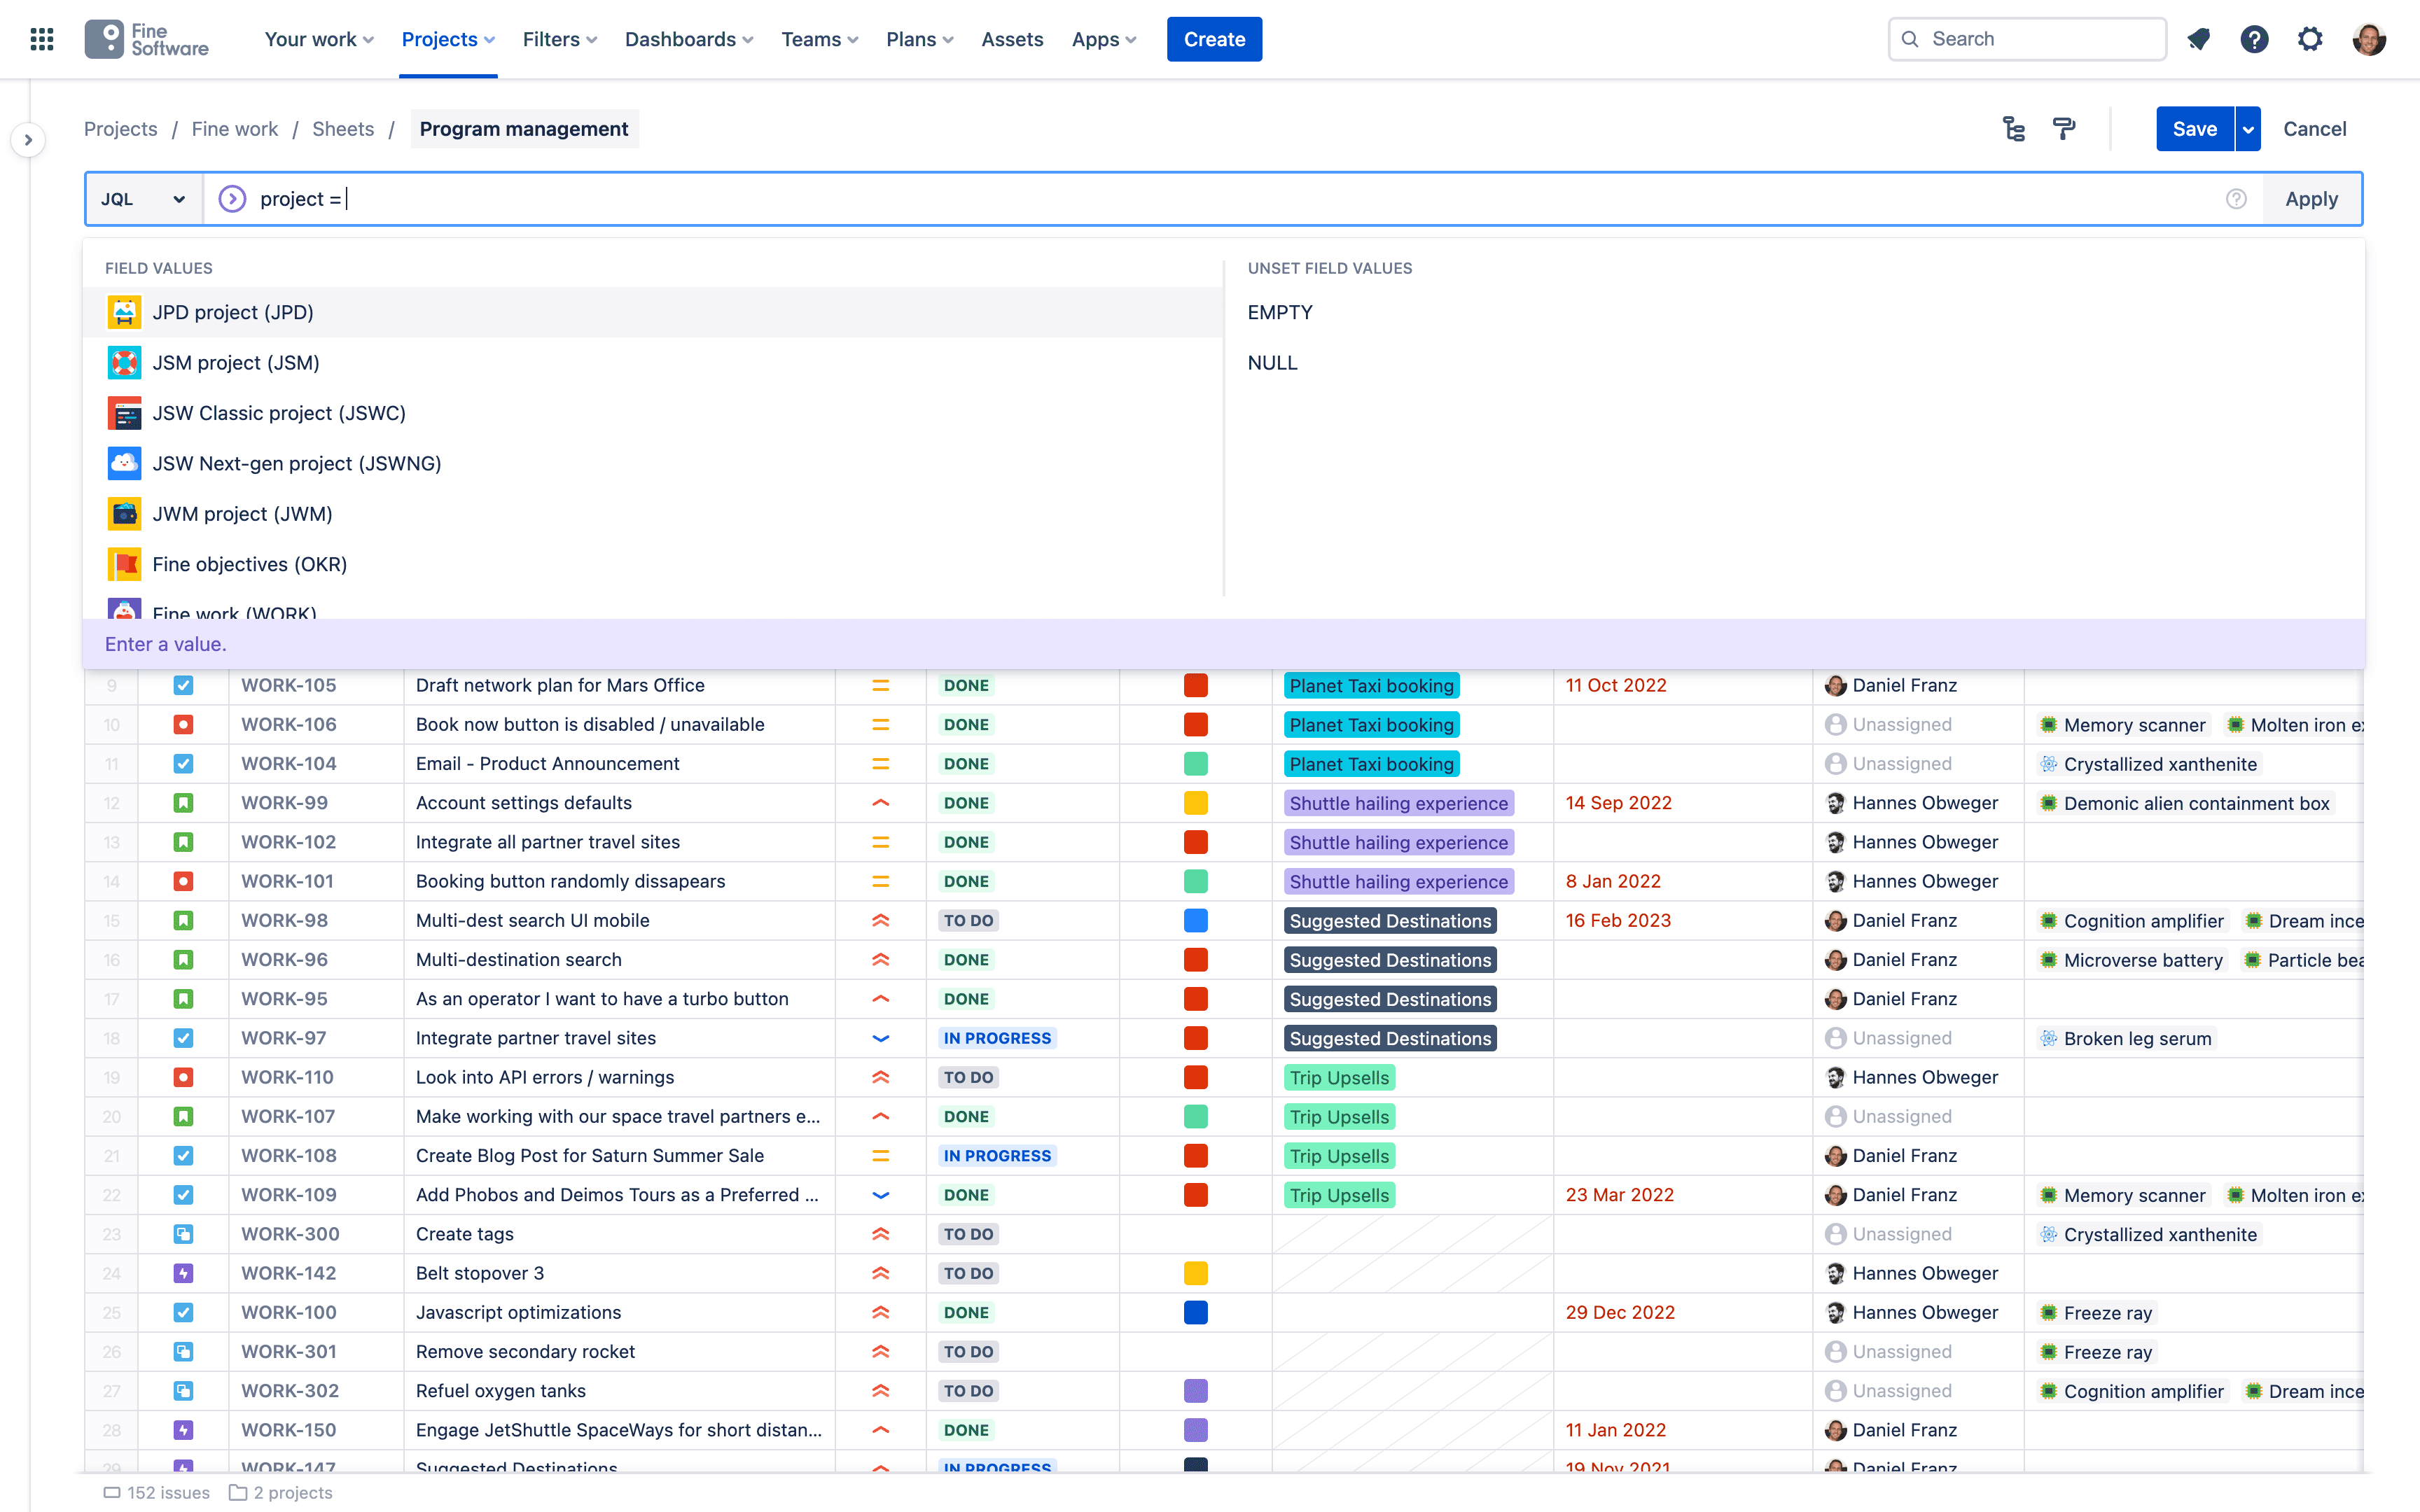
No worries if you are inexperienced with JQL, as the scope composer bar offers educational hints and a powerful auto-complete suggestions experience that guides you to your desired scope in no time. Click the Save button at the top right to commit your changes.
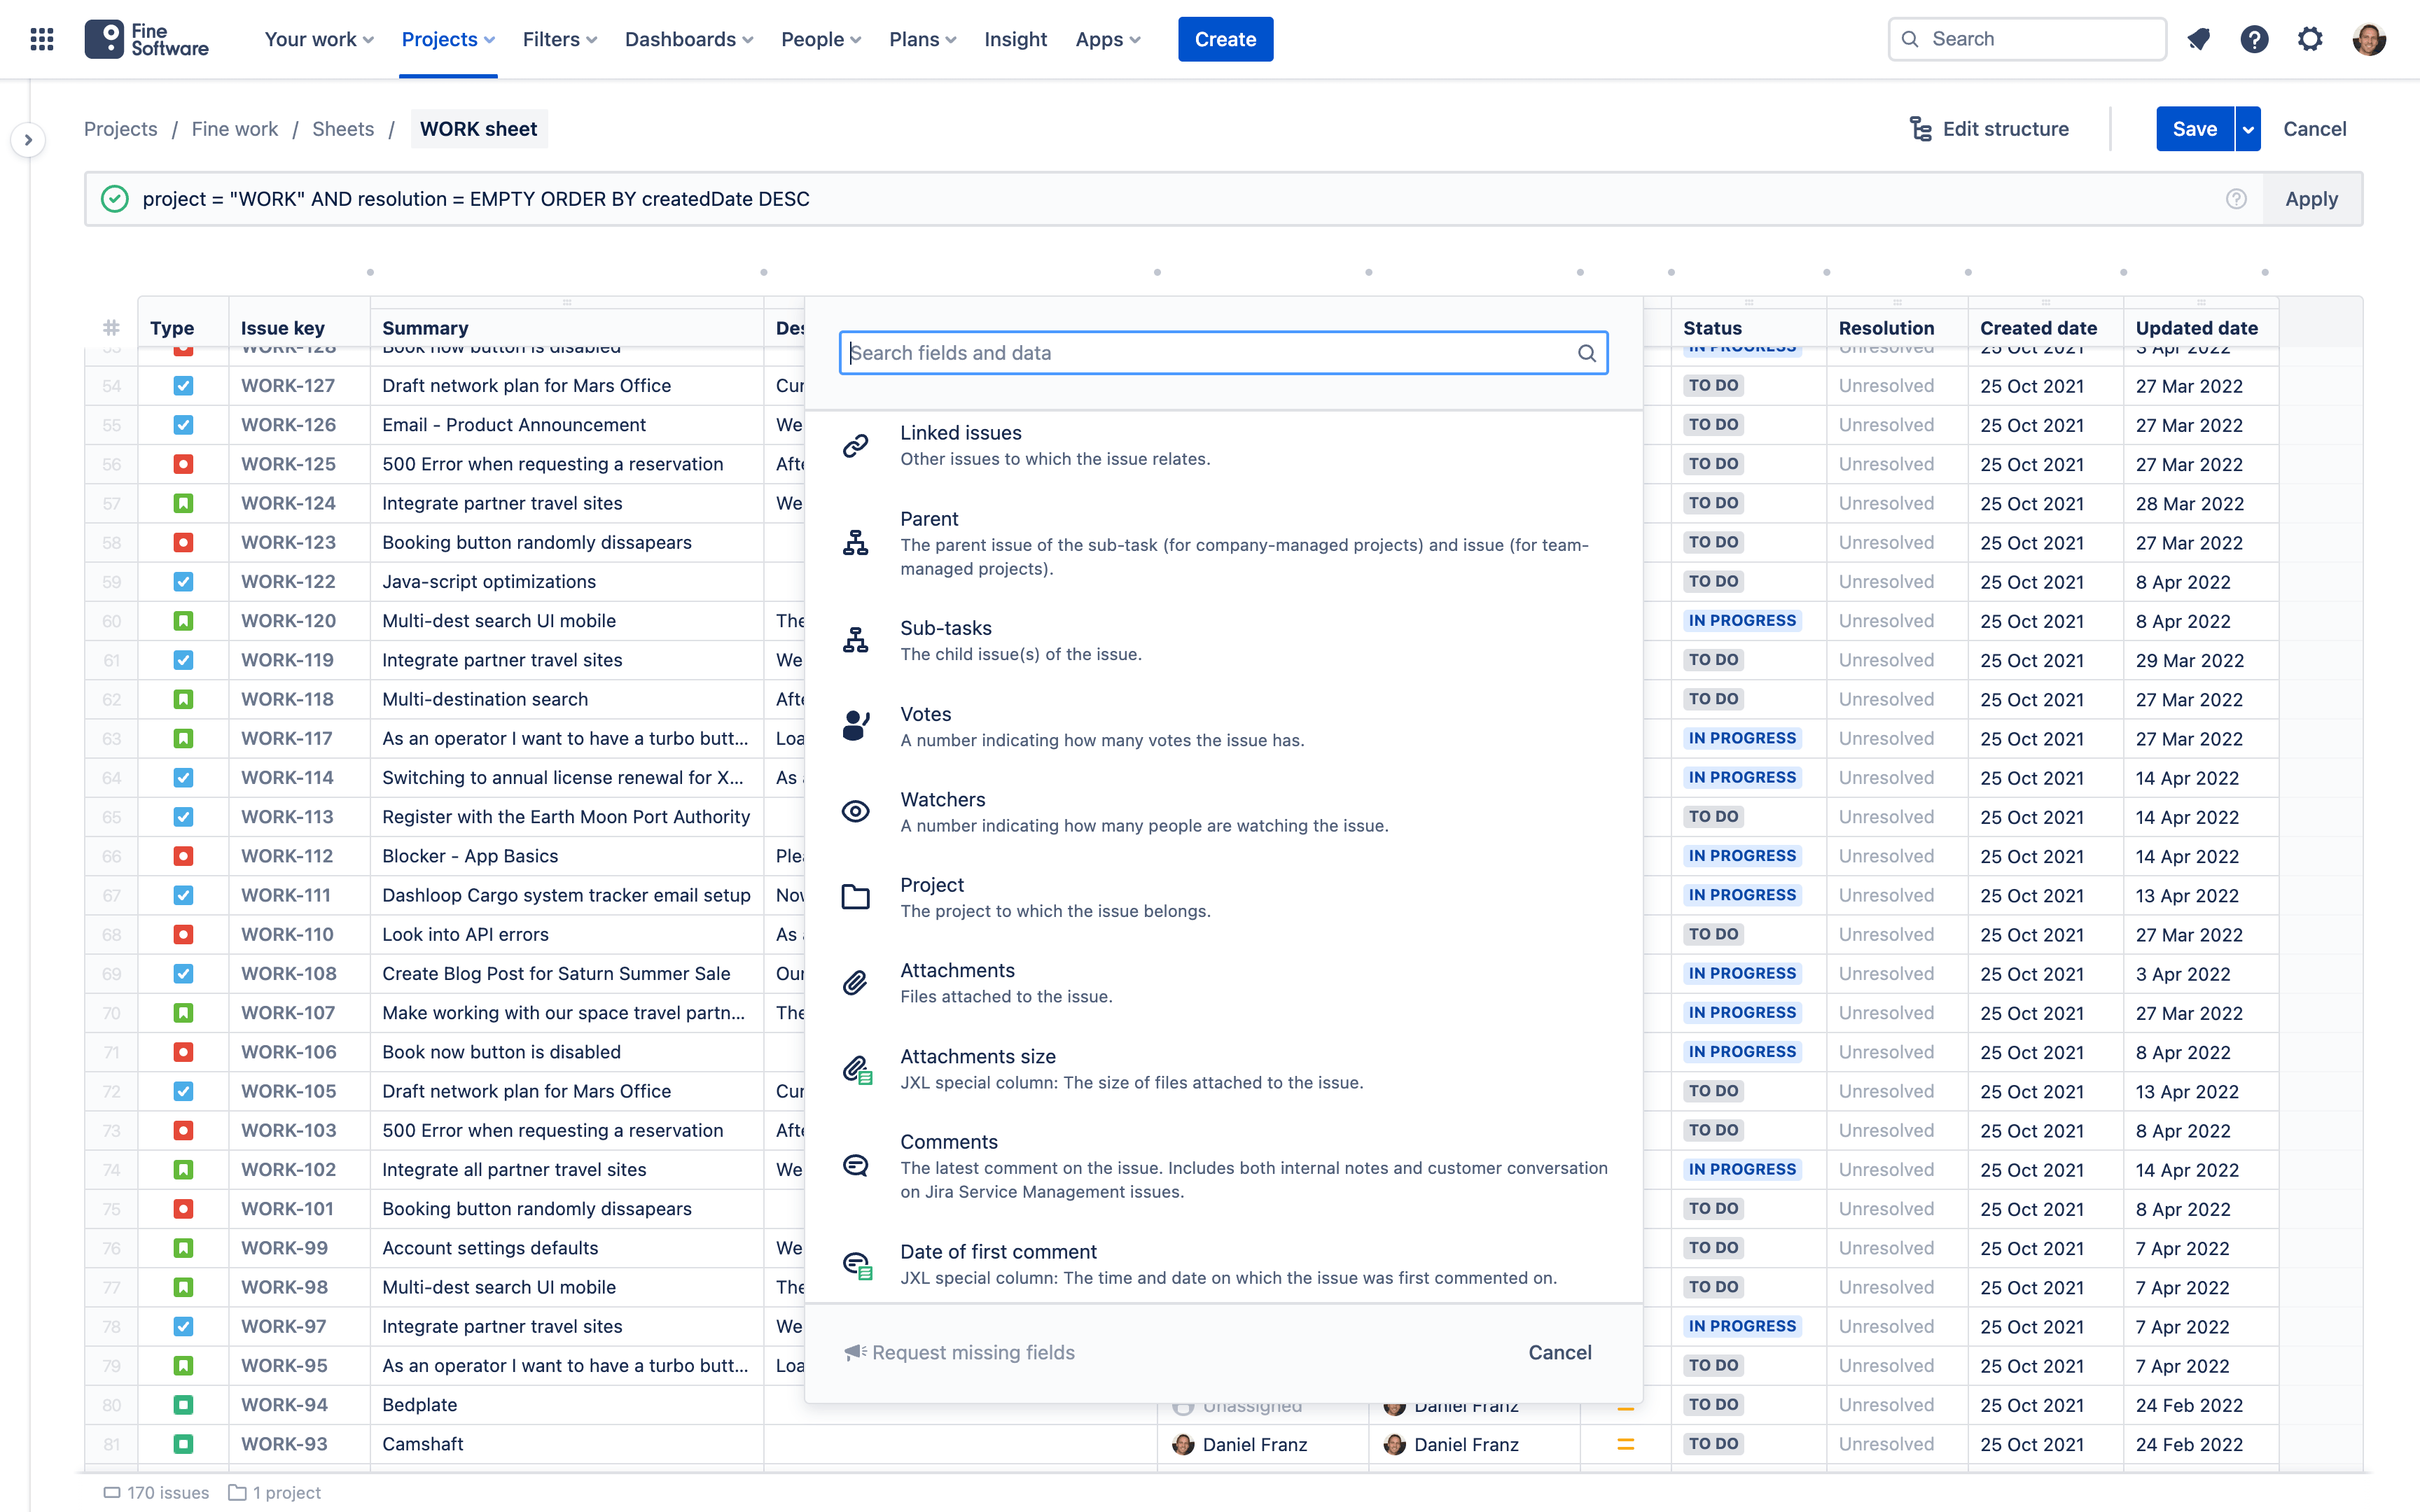
# Adding columns
To add a column to the table of a Sheet, hover with the cursor over the header of a column, a
Alternatively, click the
Pro tip
You can add columns multiple times to your table. This is helpful, for example, if you need the same column at different positions of your table, or if you need it multiple times to configure its Cell format or Cell content differently.
Notice
Keep in mind: Work types in Jira Cloud are called Issue types in Jira Data Center (opens new window)
While you can add any column to any Sheet in JXL, many table cells will only be available and editable for individual Work types if you have configured Jira accordingly. You need to have the appropriate Field added to the Work type’s Screen in your
# Removing columns
To remove a column from the table of a Sheet, hover with the cursor over the header of the relevant column, a
Alternatively, click the
# Re-arranging columns
You need to edit a Sheet for this (click
To re-arrange the order of columns in the table of a Sheet, click the handle bar above the relevant column header cell, drag it horizontally to the desired new position, and drop it there. Click the Save button at the top right to commit your changes.

# Renaming columns v1.2.5
To rename a column heading in the table of a Sheet, hover with the cursor over the header of the relevant column, a
Alternatively, edit a sheet (click the
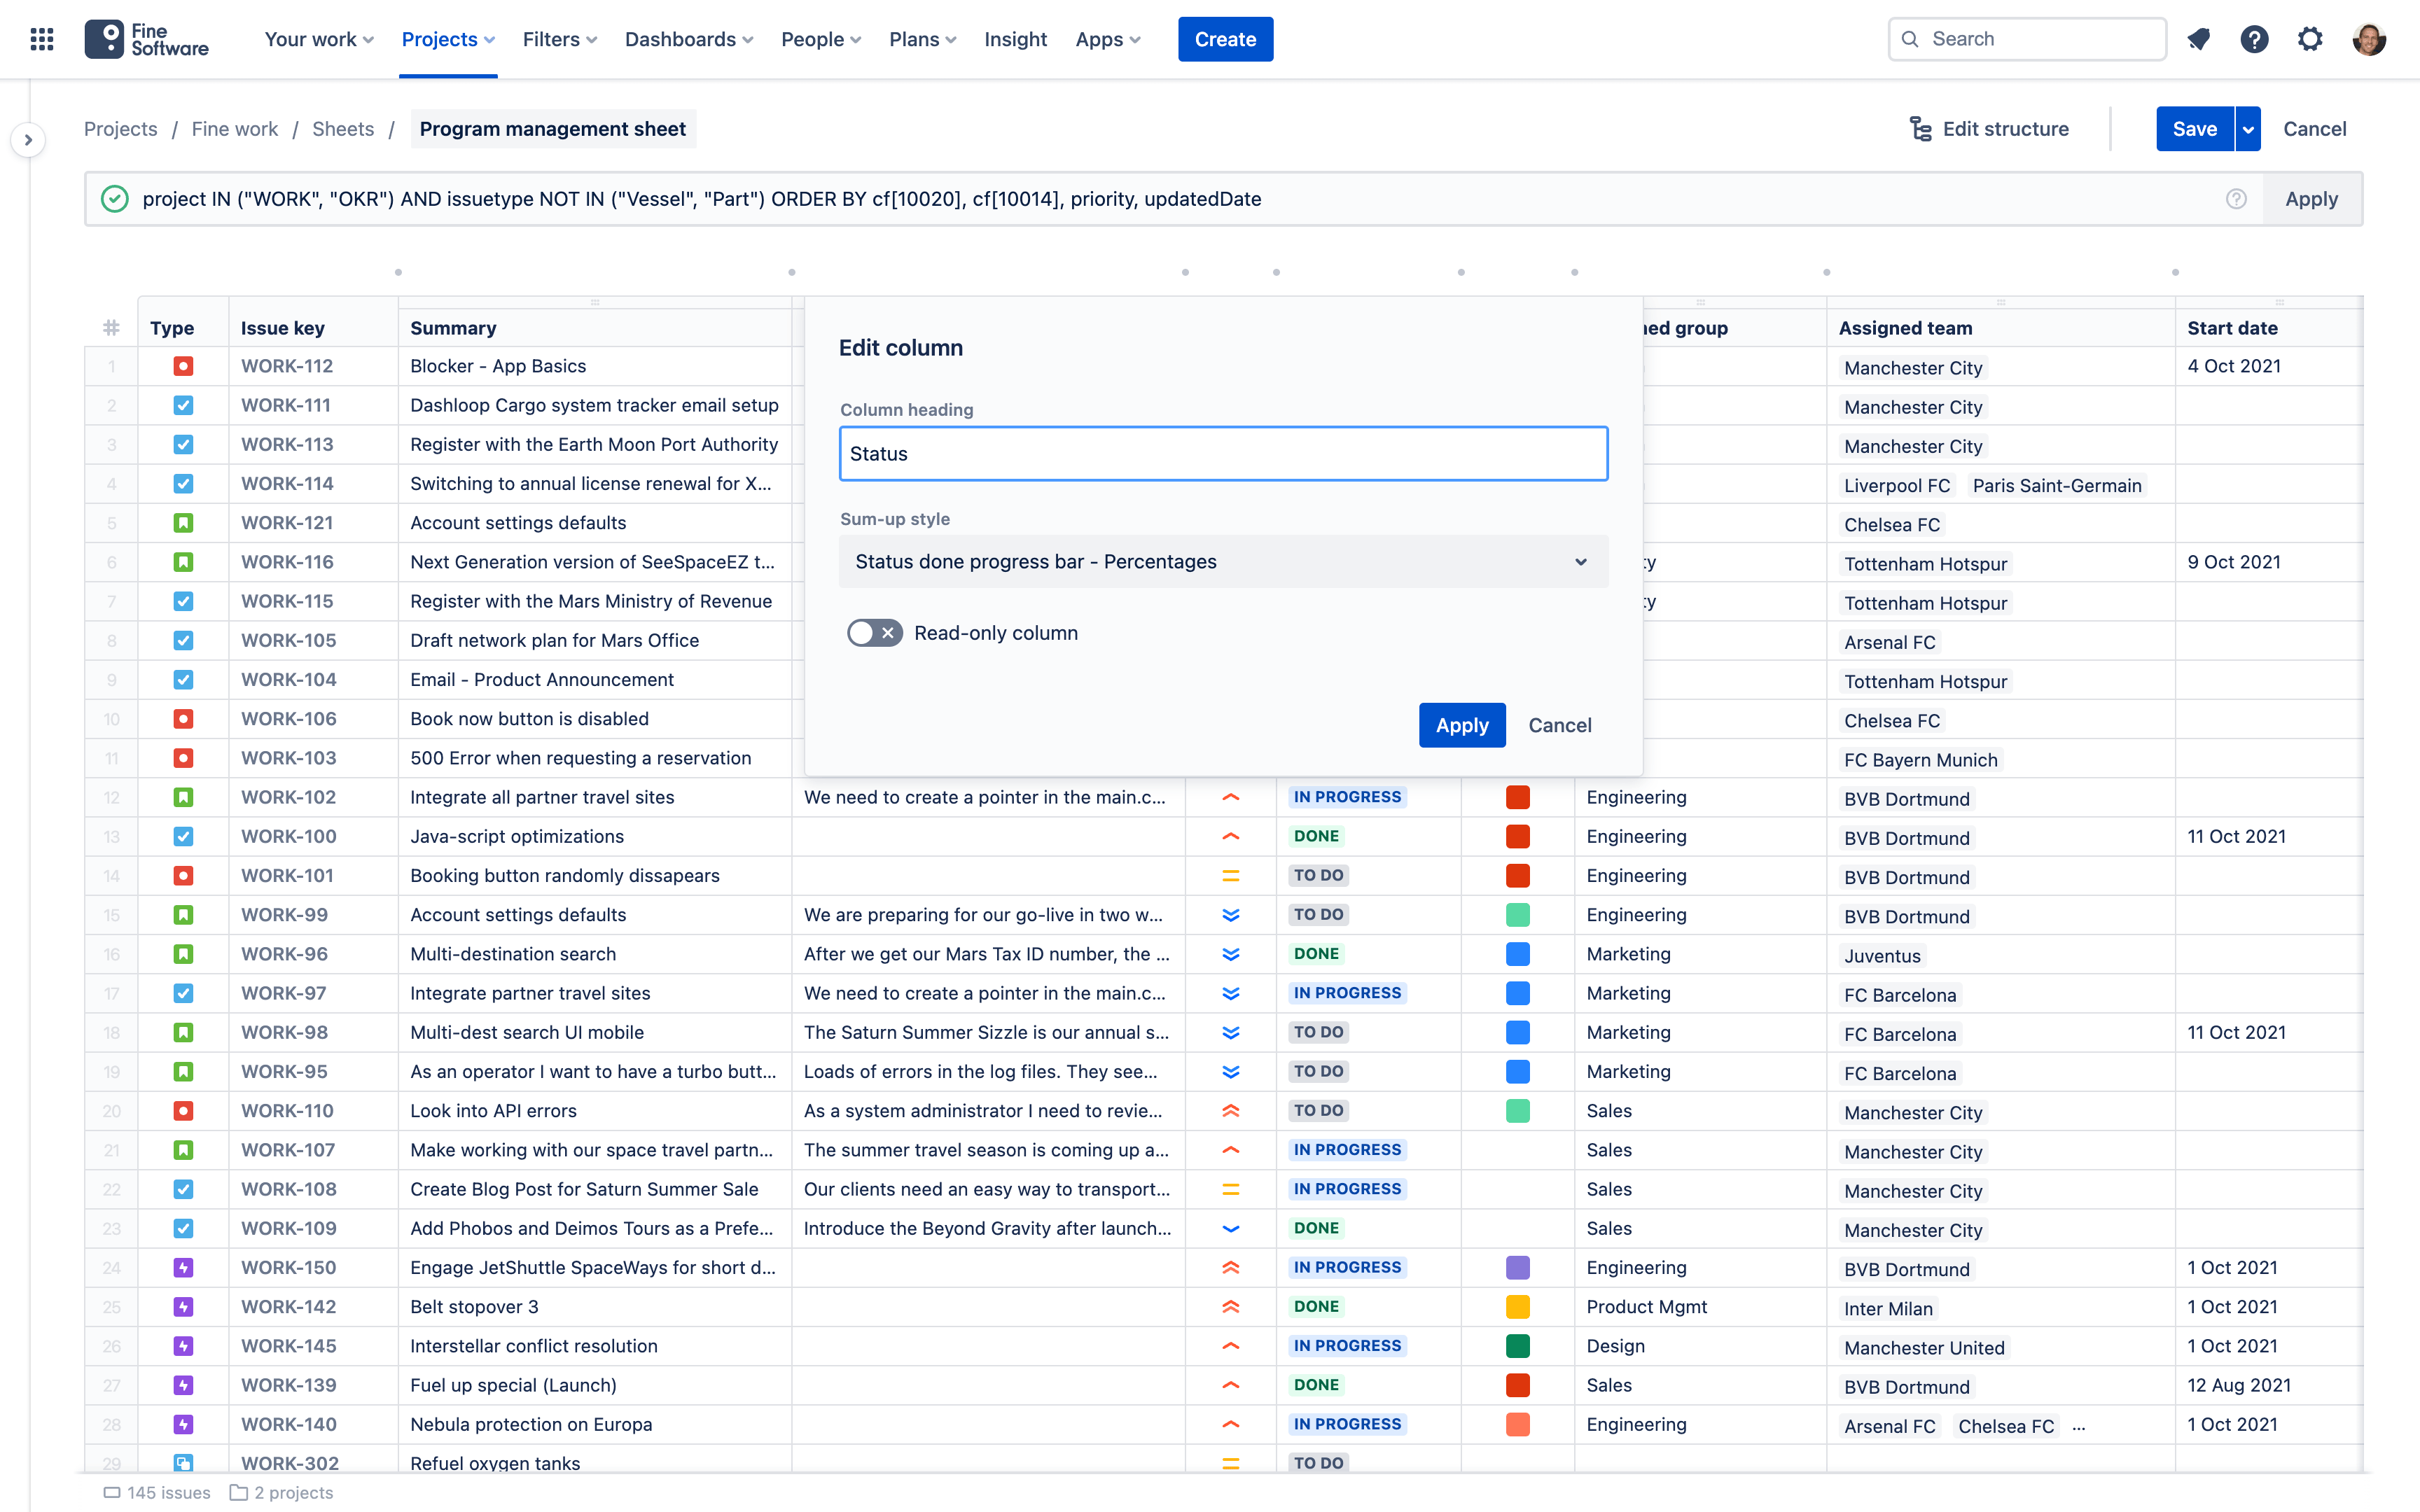
# Header format v3.0.1
To format a column header in the table of a Sheet, hover with the cursor over the header of the relevant column, a
Alternatively, edit a sheet (click the
# Cell format
For some columns you can choose between different Cell formats. For example, in time tracking columns, some History columns and Smart columns, you can configure how time values are displayed.
To do so, hover with the cursor over the header of the relevant column, a
Alternatively, edit a sheet (click the
# Cell content
For some columns you can choose between different Cell content. For example, in Work item links Smart columns you can configure which Work item link descriptions to include. v3.0.1
And in History columns that surface historical work item-related data, such as Time in status or Time between statuses, there are various Cell content configuration options. v3.5.1
To configure a column's Cell content, hover with the cursor over the header of the relevant column, a
Alternatively, edit a sheet (click the
# Work calendar v3.6.1
For some History columns and Smart columns you can optionally create a Work calendar to ensure that only your actual work time is taken into consideration, as opposed to 24/7 time. Examples include Time in status columns and most Time since... columns.
To configure a column's Work calendar, hover with the cursor over the header of the relevant column, a
Alternatively, edit a sheet (click the
The following configuration options can be set in a Work calendar.
Work days
Choose which weekdays you'd like the measurement to entail. Click on a day to toggle inclusion.
Work time
- From work hour - Set a time when work starts
- To work hour - Set a time when work ends
Time zone
If Work days or Work time differ from the default 24/7 calendar, a time zone has to be specified.
Keep in mind
If you are using a Cell format that displays days, weeks, months, or years, your Work days and Work time settings here determine how long a week and a day are for the purpose of the measurement.
Non-work dates
We are working on enabling you to additionally exclude specific dates once or annually from measurement, e.g. to account for holidays or other dates where your team is off work. Stay tuned or contact us (opens new window) if that's something you're interested in.
Non-work time
We may enable additionally excluding specific times daily from measurement, e.g. to account for breaks. Contact us (opens new window) if that's something you're interested in.
# Date and time format
Date and datetime Fields' values are formatted according to each individual User's locale preference in Jira. Unfortunately, Atlassian has tied the locale to the language preference, so the only way to affect this is by setting your Language.
In Jira Cloud, this personal setting can be found here in the Account preferences (opens new window) of the Atlassian account profile.
In Jira Data Center, this personal setting can be found by clicking on your user avatar
Not all locales' formats are supported. For the ones not currently supported, JXL falls back to English (US).
Stay tuned
We are working on making it possible to set date and datetime Fields' format for all Users to the format globally configured in the System section of
# Making columns read-only v1.3.0
Security notice
Setting a table column in a JXL Sheet to read-only disables editing of cells of this column in-situ only. If the column represents values of a Jira Field, this Field can still be edited (assuming relevant Jira Permissions are granted to the User), e.g. other columns, Jira Work item Screens, or Jira APIs.
To make cells of a column (that normally would be editable) read-only in a Sheet, hover with the cursor over the header of the relevant column, a
Alternatively, edit a sheet (click the
# Adapting sheets v1.2.1
You can use any Sheet as a layout Sheet to open it with an adapted scope and title using URL parameters. This is helpful for example when you need to integrate Sheets into processes with dynamically changing scopes of Work items and when you need to programmatically open these Sheets.
{SHEET-URL}?jql={ADAPTED-JQL-QUERY}&title={ADAPTED-TITLE}
Replace {SHEET-URL} with the URL of the Sheet you would like to use as the layout Sheet for the adapted Sheet. Any ordinary Sheet can be used as a layout Sheet and you can create various Sheets with different table column layouts for that purpose.
Replace {ADAPTED-JQL-QUERY} with a JQL statement (Jira Query Language (opens new window)) and, optionally, {ADAPTED-TITLE} with a title for your adapted Sheet. Both parameters need to be URL-encoded (percent-encoded). Example:
{SHEET-URL}?jql=project%20%3D%20"ABC"&title=My%20adapted%20sheet
# Exporting sheets
To export a Sheet to a XLSX, CSV or TSV file, open the
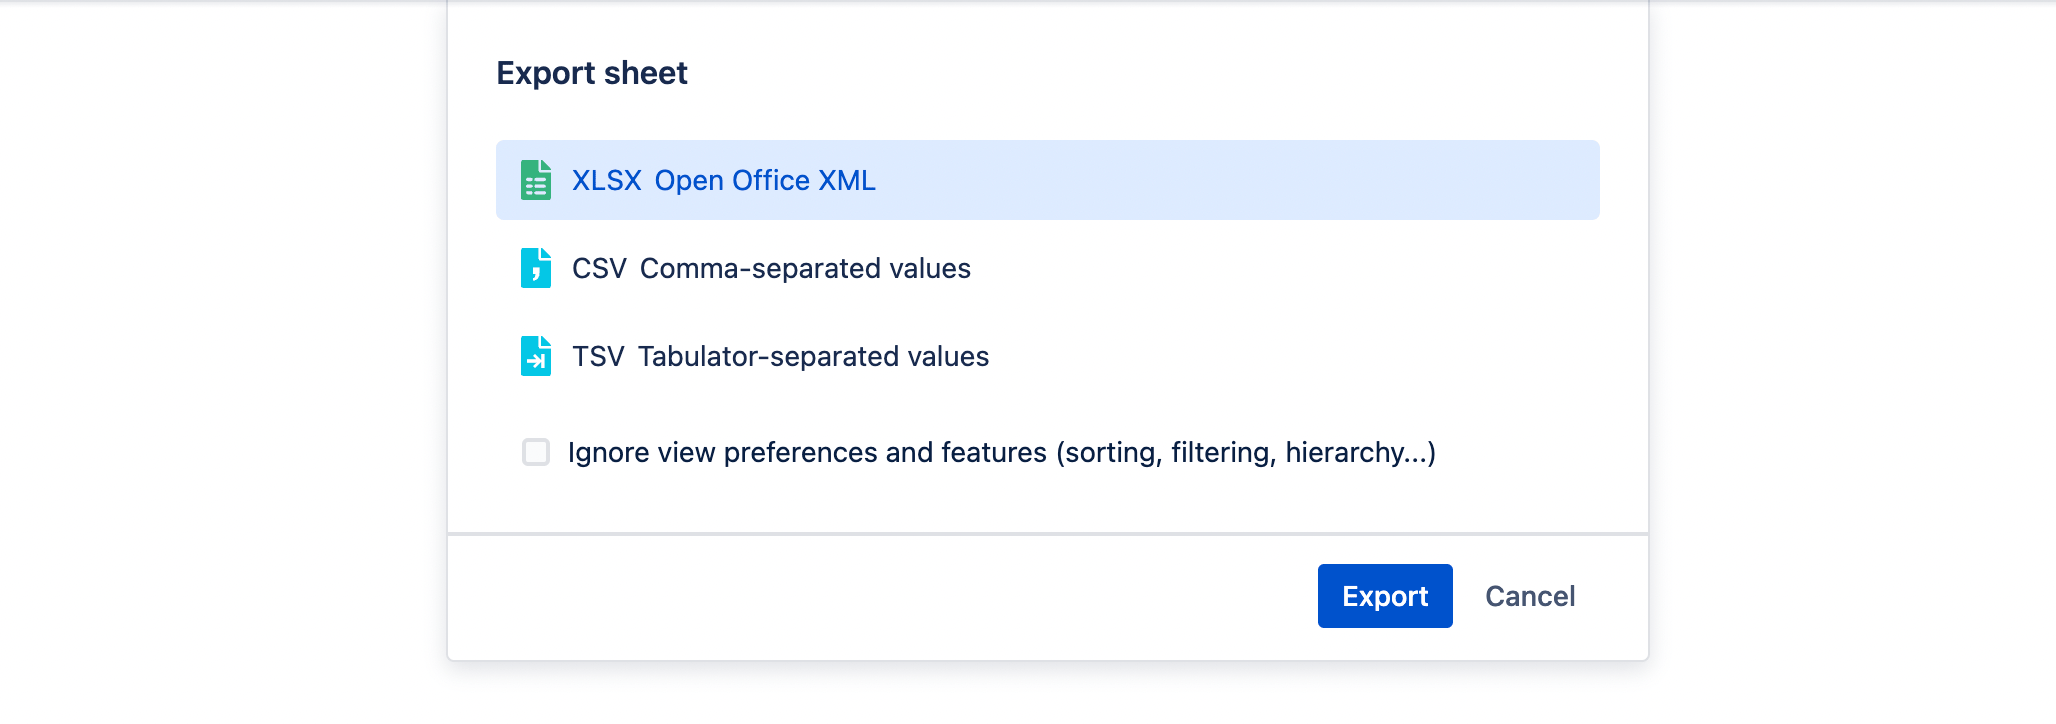
You can activate the Ignore view preferences and features checkbox in the dialog to ensure all Work items in the sheet scope will be exported (disregarding potentially currently active column filtering and sheet search), in the original sort order of the sheet scope (disregarding potentially currently active column sorting).
# Sharing sheets v2.4.0
To invite others to work in a Sheet with you, click the
If you'd like to share a link to the Sheet in a particular state of features and view preferences, consider (creating and) choosing a View in the menu at the top of the dialog.
Options v4.1.5
If these switches are toggled off, parameters are appended to the sheet URL. Keep in mind that this is not a security feature. The following options are not a replacement for Permissions or Sheet access management, but mere temporary display preferences that can be circumvented by recipients.
- Enable sheet editing - Switching this toggle off disables editing of the Sheet itself, regardless of otherwise relevant Permissions the recipients might have. v4.1.5
- Enable view preferences editing - If a View is selected, switching this toggle off disables editing of any features and view preferences that are saved in the View. Any features and view preferences that are not saved in the selected View will be editable by the recipients. v4.5.0
- Enable work item editing in sheet - Switching this toggle off disables editing of Work items in the sheet, regardless of otherwise relevant Permissions the recipients might have. v4.1.5
- Enable work item creation in sheet - Switching this toggle off disables creation of Work items in the sheet, regardless of otherwise relevant Permissions the recipients might have. v5.2.0
# Embedding sheets
To embed a Sheet into a Confluence Cloud Page, edit the Page and add the Sheet Macro. Once added, set the Sheet and View you'd like to show.
- Choose the Space in which the Sheet is located.
- Choose the Sheet you'd like to show.
- Optionally, choose a View you'd like to show.
Keep in mind
If a View is selected here, visitors of the Macro are not able to change any of the features and view preferences that are saved in that View.
In other words, you can use a View to lock the appearance of the Sheet in the Macro. This is helpful when you'd like to prevent Users from switching to other Views, from sorting, filtering, hiding, freezing, resizing columns, or from enabling or disabling sheet features such as Sum-ups, Grouping, Hierarchy, Structures, and Conditional formats.
Atlassian Government Cloud
The embed features are currently unavailable on Atlassian Government Cloud, as Atlassian does not yet offer the technical foundations for them in this environment.
Administration required to use the Confluence macro!
To use the Sheet Macro in Confluence Cloud, someone with the Organisation admin or Site admin Role must initially connect JXL to Confluence. This can be done in the Connected apps section of Atlassian Administration (opens new window). Find the JXL app in the list and click View app details next to it. On the app details page, open the Connections tab at the top, next to Confluence click Connect, and follow further steps.
To embed a Sheet into a Confluence Data Center Page, first get an embeddable address. Click the
Options v4.1.5
If these switches are toggled off, parameters are appended to the sheet URL. Keep in mind that this is not a security feature. The following options are not a replacement for Permissions or Sheet access management, but mere temporary display preferences that can be circumvented by visitors.
- Enable sheet editing - Switching this toggle off disables editing of the Sheet itself, regardless of otherwise relevant Permissions visitors might have. v4.1.5
- Enable view preferences editing - If a View is selected, switching this toggle off disables editing of any features and view preferences that are saved in the View. Any features and view preferences that are not saved in the selected View will be editable by visitors. v4.5.0
- Enable work item editing in sheet - Switching this toggle off disables editing of Work items in the sheet, regardless of otherwise relevant Permissions the visitors might have. v4.1.5
- Enable work item creation in sheet - Switching this toggle off disables creation of Work items in the sheet, regardless of otherwise relevant Permissions the visitors might have. v5.2.0
Now edit the Page in which you'd like to embed the Sheet, add the HTML Macro (the HTML Include Macro is not supported), write an <iframe> tag (opens new window) in it, and reference the embeddable address of the Sheet as the source (How to put an iframe into Confluence (opens new window)).
Receiving an error when trying to embed a Jira Cloud sheet URL externally?
Atlassian generally does not allow embedding of any Jira Cloud web pages outside of the same site, i.e. under a different hostname.
Receiving an error in Confluence Data Center?
If instead of Sheets your browser displays a blank space, "refused to connect", "can’t open", or similar error message in Confluence Data Center, the security settings of your site prevent pages from being embedded in frames. This is a security measure against clickjacking introduced in Jira v7.6 and can be adjusted to exclude sheet URLs and paths using a JVM_SUPPORT_RECOMMENDED_ARGS section in the setenv file (Security headers in Jira (opens new window)).
Also ensure that connections to sheet URLs and paths are allowed on your Allowlist in
# Using sheets on dashboards v4.6.0
To add a sheet to a Dashboard in Jira, navigate to Dashboards and add the Sheet gadget (Add and customize gadgets (opens new window)). Once added, set the Sheet and View you'd like to show by clicking its
- Choose the Space/Project in which the Sheet is located.
- Choose the Sheet you'd like to show.
- Optionally, choose a View you'd like to show.
Keep in mind
If a View is selected here, visitors of the gadget are not able to change any of the features and view preferences that are saved in that View.
In other words, you can use a View to lock the appearance of the Sheet in the gadget. This is helpful when you'd like to prevent Users from switching to other Views, from sorting, filtering, hiding, freezing, resizing columns, or from enabling or disabling sheet features such as Sum-ups, Grouping, Hierarchy, Structures, and Conditional formats.