# Working in sheets
# View preferences
# Resizing columns
To widen or narrow a table column, click the right-hand-side border of its column header cell, drag it horizontally to the desired new position, and drop it there.
# Freezing columns
By default, the Work type and Work item key columns are frozen on the left of the table. You can also freeze other columns. Hover with the cursor over the header of the relevant column, a
To reset column freezing, click the
# Hiding columns v3.4.0
To hide a column in the table of a Sheet, hover with the cursor over the header of the relevant column, a
This is helpful, for example, when you'd like to save different column layouts in different Views. That way, you can switch between different column layouts within the same Sheet by switching Views.
To unhide columns, click the
# Redacting columns v3.4.0
To redact a column in the table of a Sheet, hover with the cursor over the header of the relevant column, a
This is helpful, for example, when you'd like to temporarily mask specific columns that contain sensitive information, so you can take a screenshot of your Sheet or show it in a meeting.
To unredact columns, click the
# Sorting columns
To sort a Sheet by a column's values, hover with the cursor over the header of the relevant column, a
You can also reset column sorting by clicking the
Pro tip
If you are looking to sort the Work items in your Sheet by multiple Fields, use an ORDER BY clause in the JQL query (Jira Query Language (opens new window)) of your sheet scope. You can find the syntax here in Atlassian’s documentation (opens new window).
# Filtering columns
You can filter the contents of a Sheet by defining field values in one or multiple columns. Hover with the cursor over the header of the relevant column, a
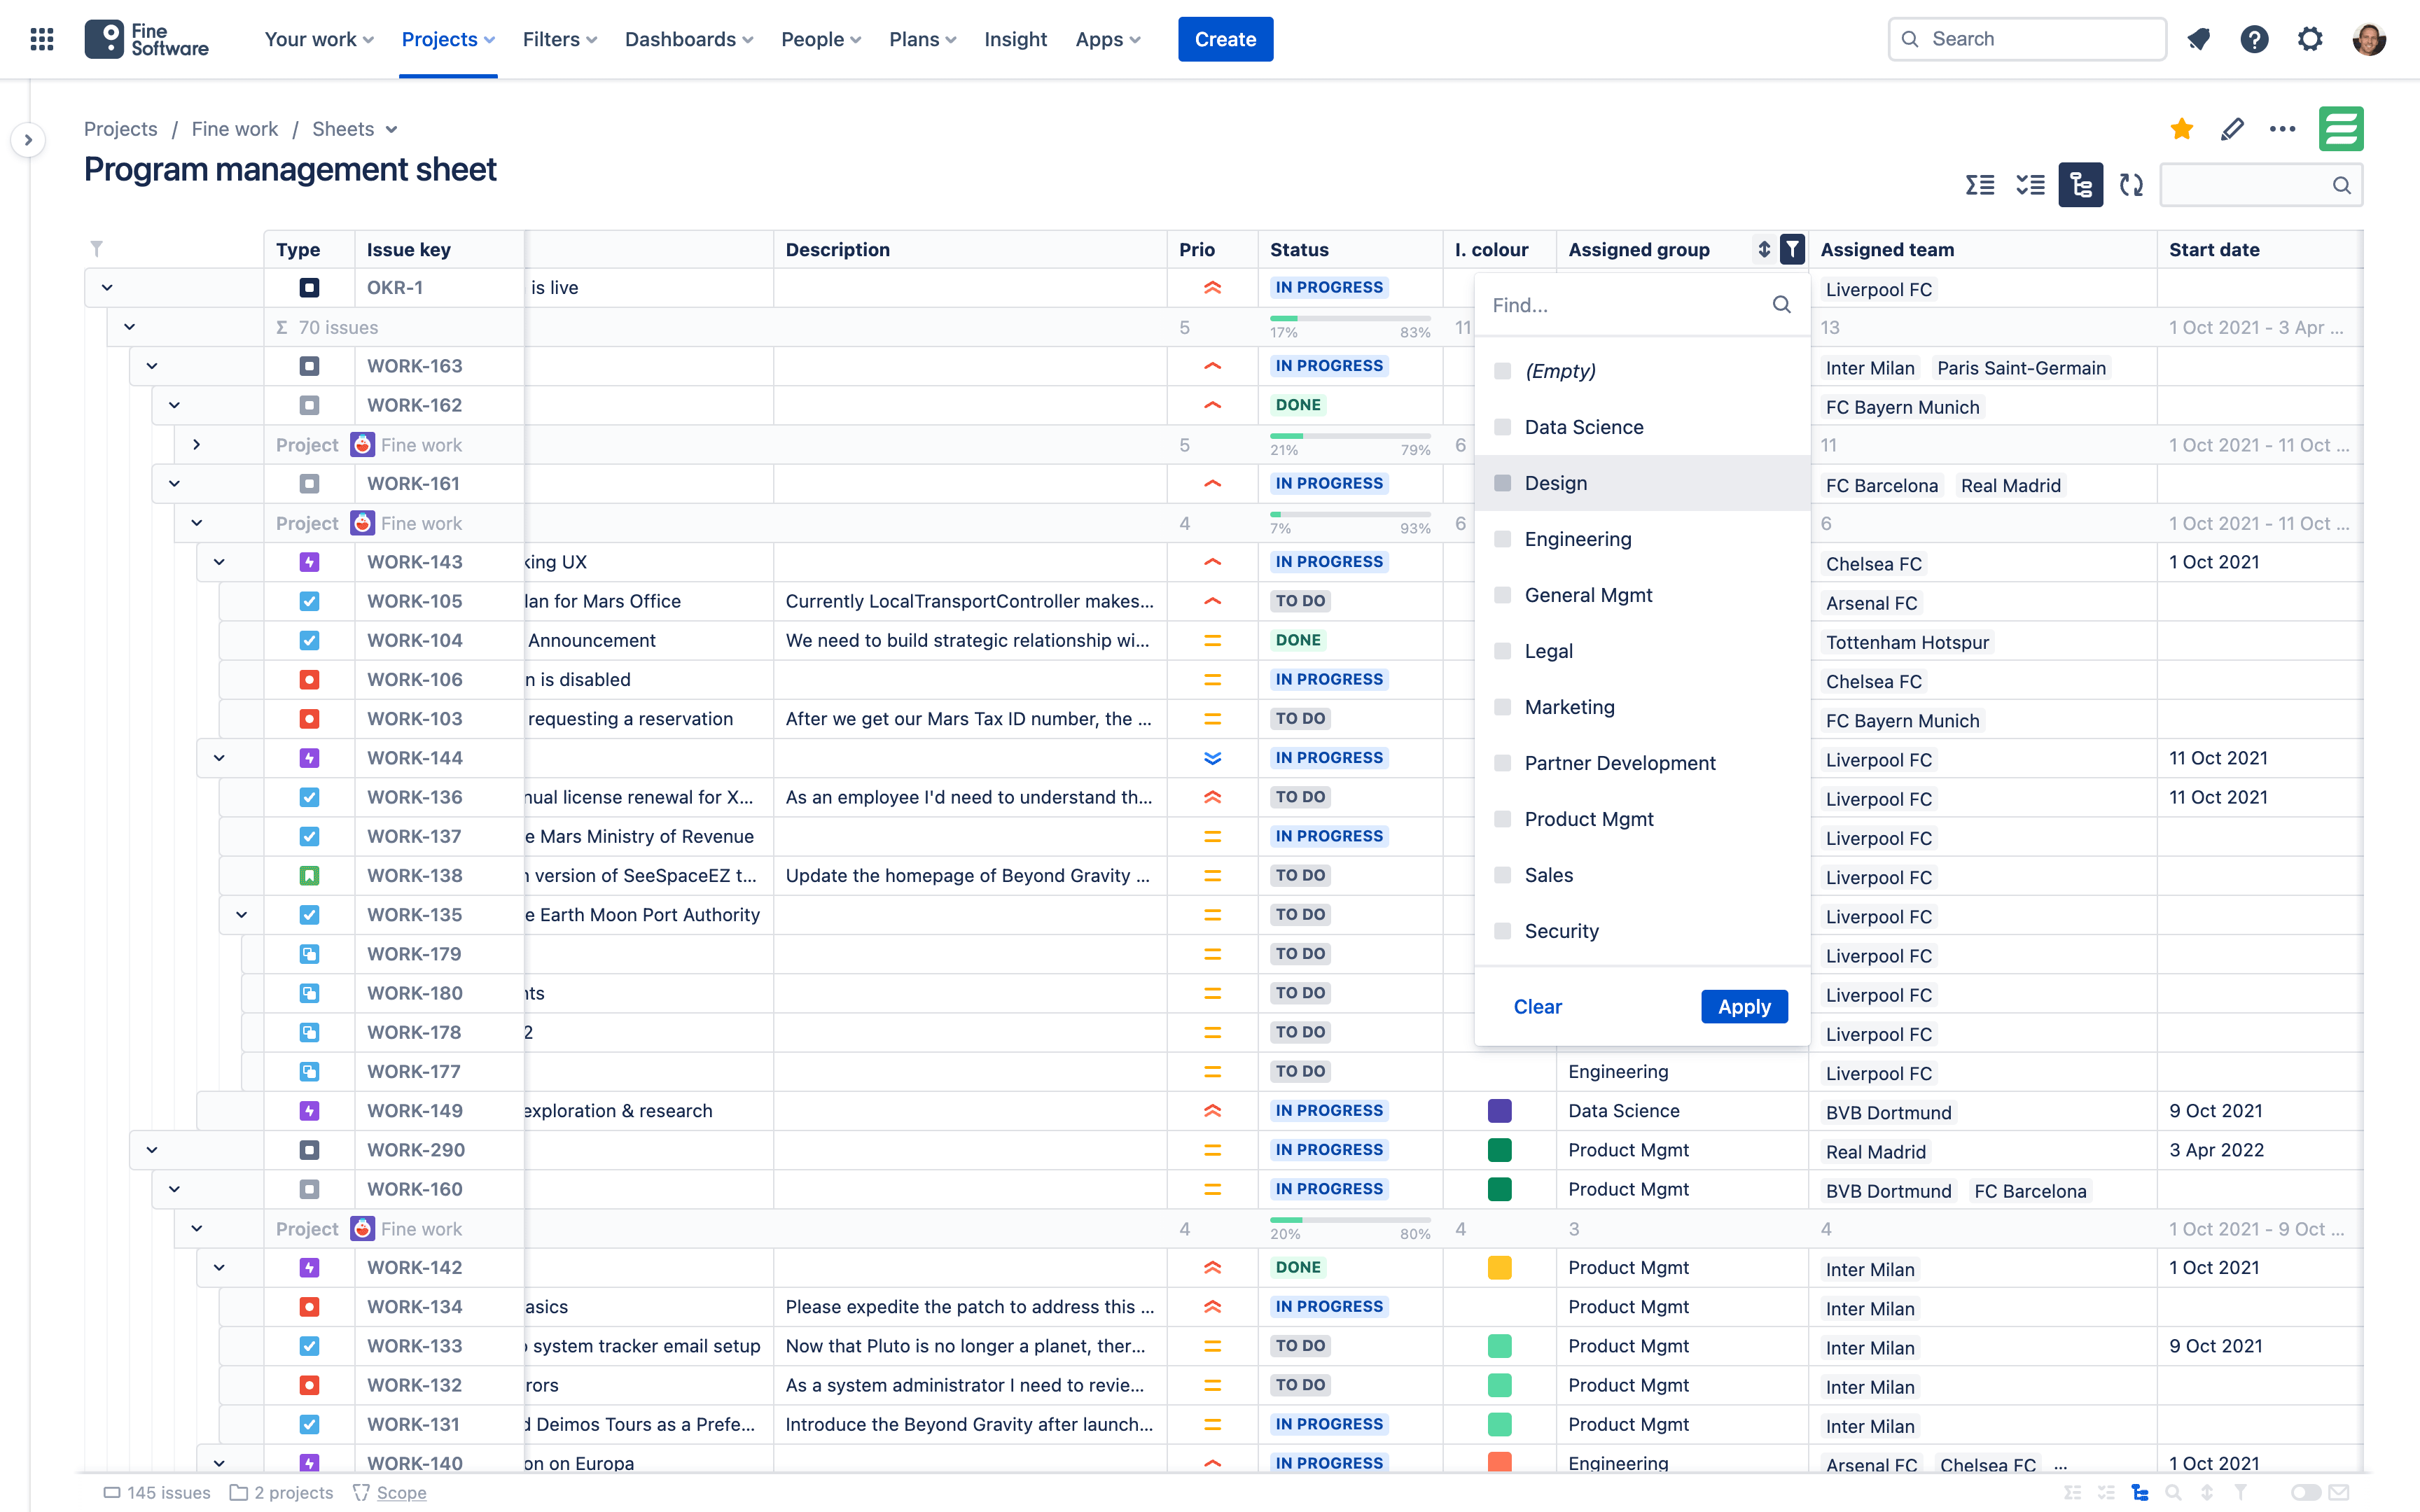
At the top of many columns' filtering menus, you can switch between different filter styles, such as Option filter, Text filter, Number filter, Date filter, Date and time filter, Time filter.
The search field in Text filters optionally accepts logical operators and regular expressions. See Using logical operators and Using regular expressions for more details.
If Hierarchy or Structure are enabled, you can choose whether ancestor and descendant Work items of column filtering and table search matches should stay visible. Click the
To clear filtering, click the
Pro tip
If you are unsure if a Sheet is currently filtered, have a look at the status bar at the bottom right corner of the page. Icons are indicating whether you have applied any view preferences. If so, then you can remove them all at once by clicking for example on the
# Filtering levels v1.2.7
To generally hide Work items without children or parents in a Hierarchy or Structure, click the
In the Level filtering section of the dialog that opens, in the Work items without children menu, you can choose Hide top level work items or Hide parent level work items. v1.2.7
In the Work items without parents menu, you can choose Hide child level work items or Hide bottom level work items. v2.5.1
Parent levels are all Levels above the lowest Level. Child levels are all Levels below the top-most Level. Top level means only the top-most Level. Bottom level means only the lowest Level. E.g. in a Structure with five Levels, counting from the lowest up, Parent levels would be 2, 3, 4, 5, Child levels would be 1, 2, 3, 4, Top level is only 5, and Bottom level is only 1.
To only show Work items that satisfy criteria of the enabled Hierarchy or Structure, activate the Hide work items outside levels checkbox. This hides Work items that would otherwise get listed in "Other level X work items" groupings at the bottom of the table or Levels, as they are not part of the tree. v2.5.1
To reset this preference to its default state, click the
# Table search
You can filter the contents of a Sheet using the search field above the table at the right of the page.
The table search optionally accepts logical operators and regular expressions. See Using logical operators and Using regular expressions for more details.
If Hierarchy or Structure are enabled, you can choose whether ancestor and descendant Work items of column filtering and table search matches should stay visible. Click the
To clear the table search, empty the search field or click the
# Level-specific search and filtering v1.2.7
JXL for Jira Data Center v1.2.7 − v.3.2.0
To exclude Levels of a Hierarchy or Structure from your Column filtering, click the
You can choose Only filter top level or Only filter parent levels. This is helpful, for example, when you need to exclude sub-tasks from column filtering. v1.2.7
You can also choose Only filter child levels or Only filter bottom level. This is helpful, for example, when you need to exclude higher-level Work items from column filtering. v1.5.6
To exclude Levels of a Hierarchy or Structure from your Column filtering or Table search, click the
You can choose between Apply to all levels (default), Apply to top level, Apply to parent levels, Apply to child levels, and Apply to bottom level. This is helpful, for example, when you need to exclude sub-tasks or higher-level Work items from column filtering or search.
Parent levels are all Levels above the lowest Level. Child levels are all Levels below the top-most Level. Top level means only the top-most Level. Bottom level means only the lowest Level. E.g. in a Structure with five Levels, counting from the lowest up, Parent levels would be 2, 3, 4, 5, Child levels would be 1, 2, 3, 4, Top level is only 5, and Bottom level is only 1.
To reset this preference to its default state, click the
# Using logical operators v1.2.3
To enter a logical statement in a text search, make sure the
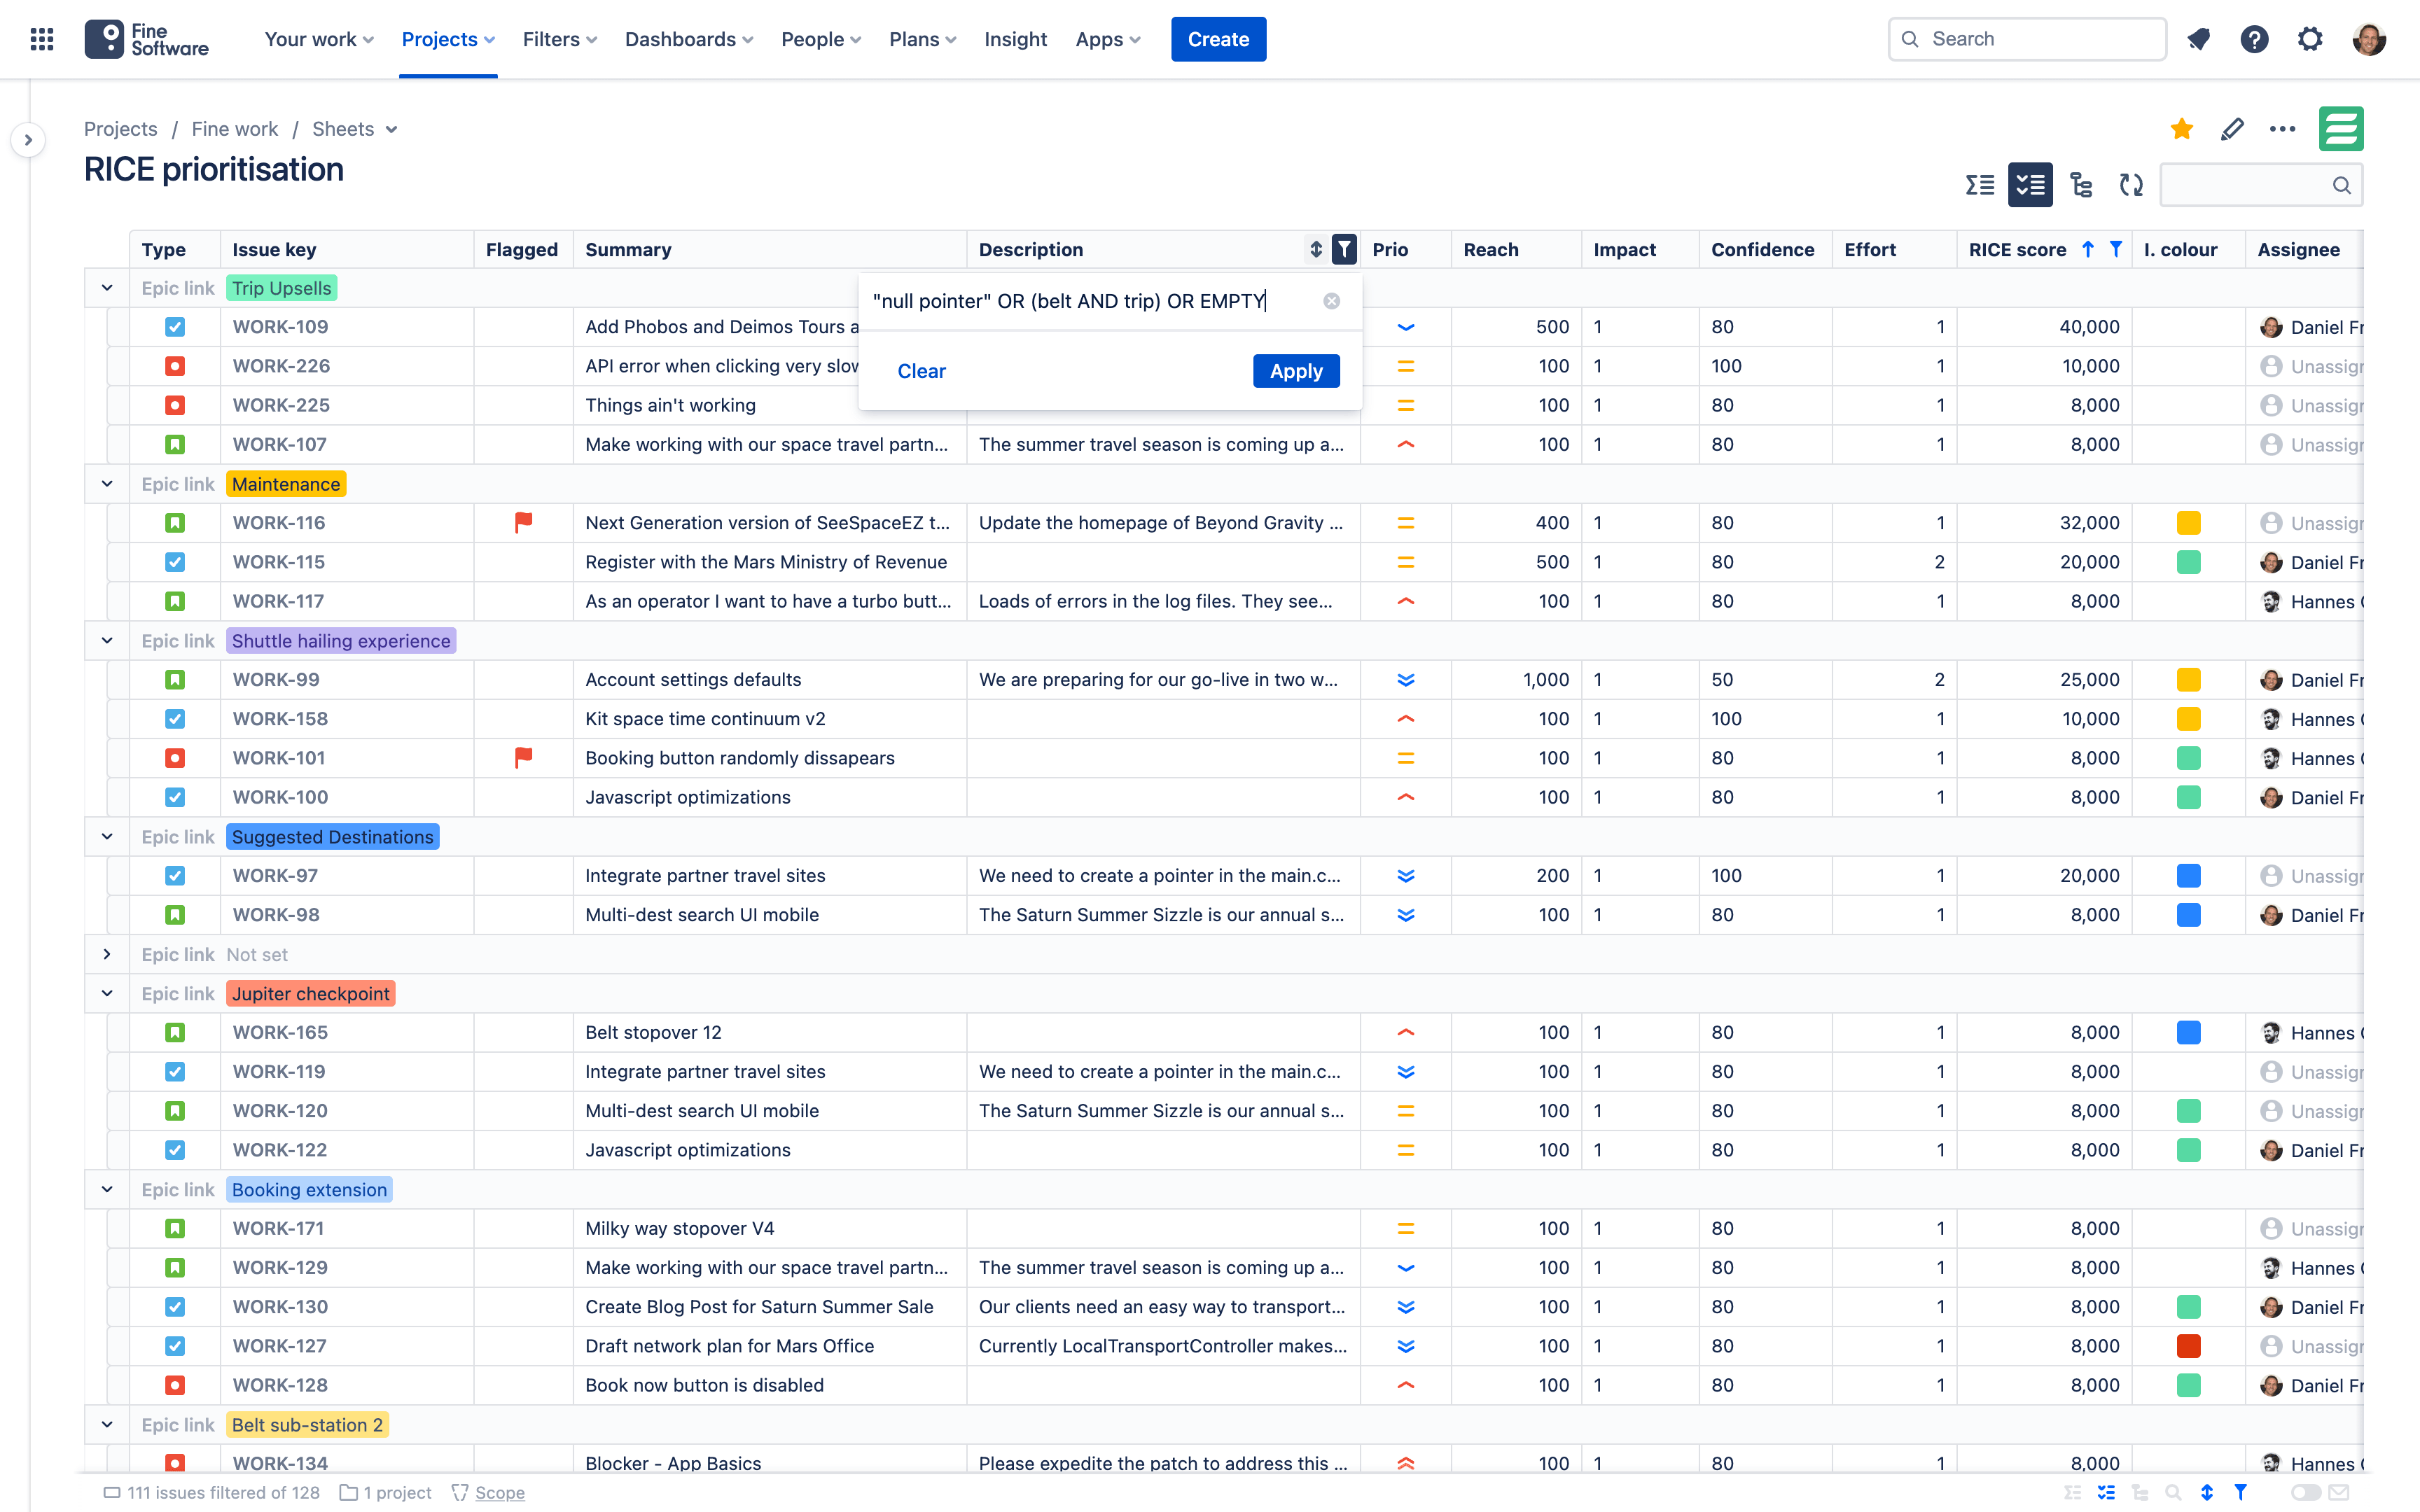
Disjunction OR
Matches will include at least one of the expressions.
term1 OR term2
This is also the default connective used if you don't type any operator. I.e. it is equivalent to:
term1 term2
Conjunction AND
Matches will include all of the expressions.
term1 AND term2
The precedence of the AND operator is higher than that of the OR operator.
Negation NOT
Matches will not include the expression.
term1 AND NOT term2
Empty values EMPTY v1.5.3
Matches empty cells.
EMPTY
Also usable in a disjunction.
term1 OR EMPTY
If you'd like all Work items returned that have any value set, use EMPTY in a negation.
NOT EMPTY
Grouping ( )
Using round parentheses you can group expressions to control operators' precedence in the order of evaluation.
(term1 OR term2) AND term3
Phrasing and escaping " "
By surrounding expressions with quotation marks you can search for exact phrases.
term1 "term2 term3 term4"
If the phrase you're searching for includes double quotation marks, surround it with single quotation marks.
'term1 term2 "term3 term4"'
If it includes single quotation marks, surround it with double quotation marks.
"term1 term2 'term3 term4'"
If it includes reserved words such as EMPTY or NULL, also surround it with quotation marks.
"phrase with terms empty or null"
# Using regular expressions v3.1.0
To enter a regular expression (opens new window) in a text search, make sure the
# Working with work items
# Editing cells
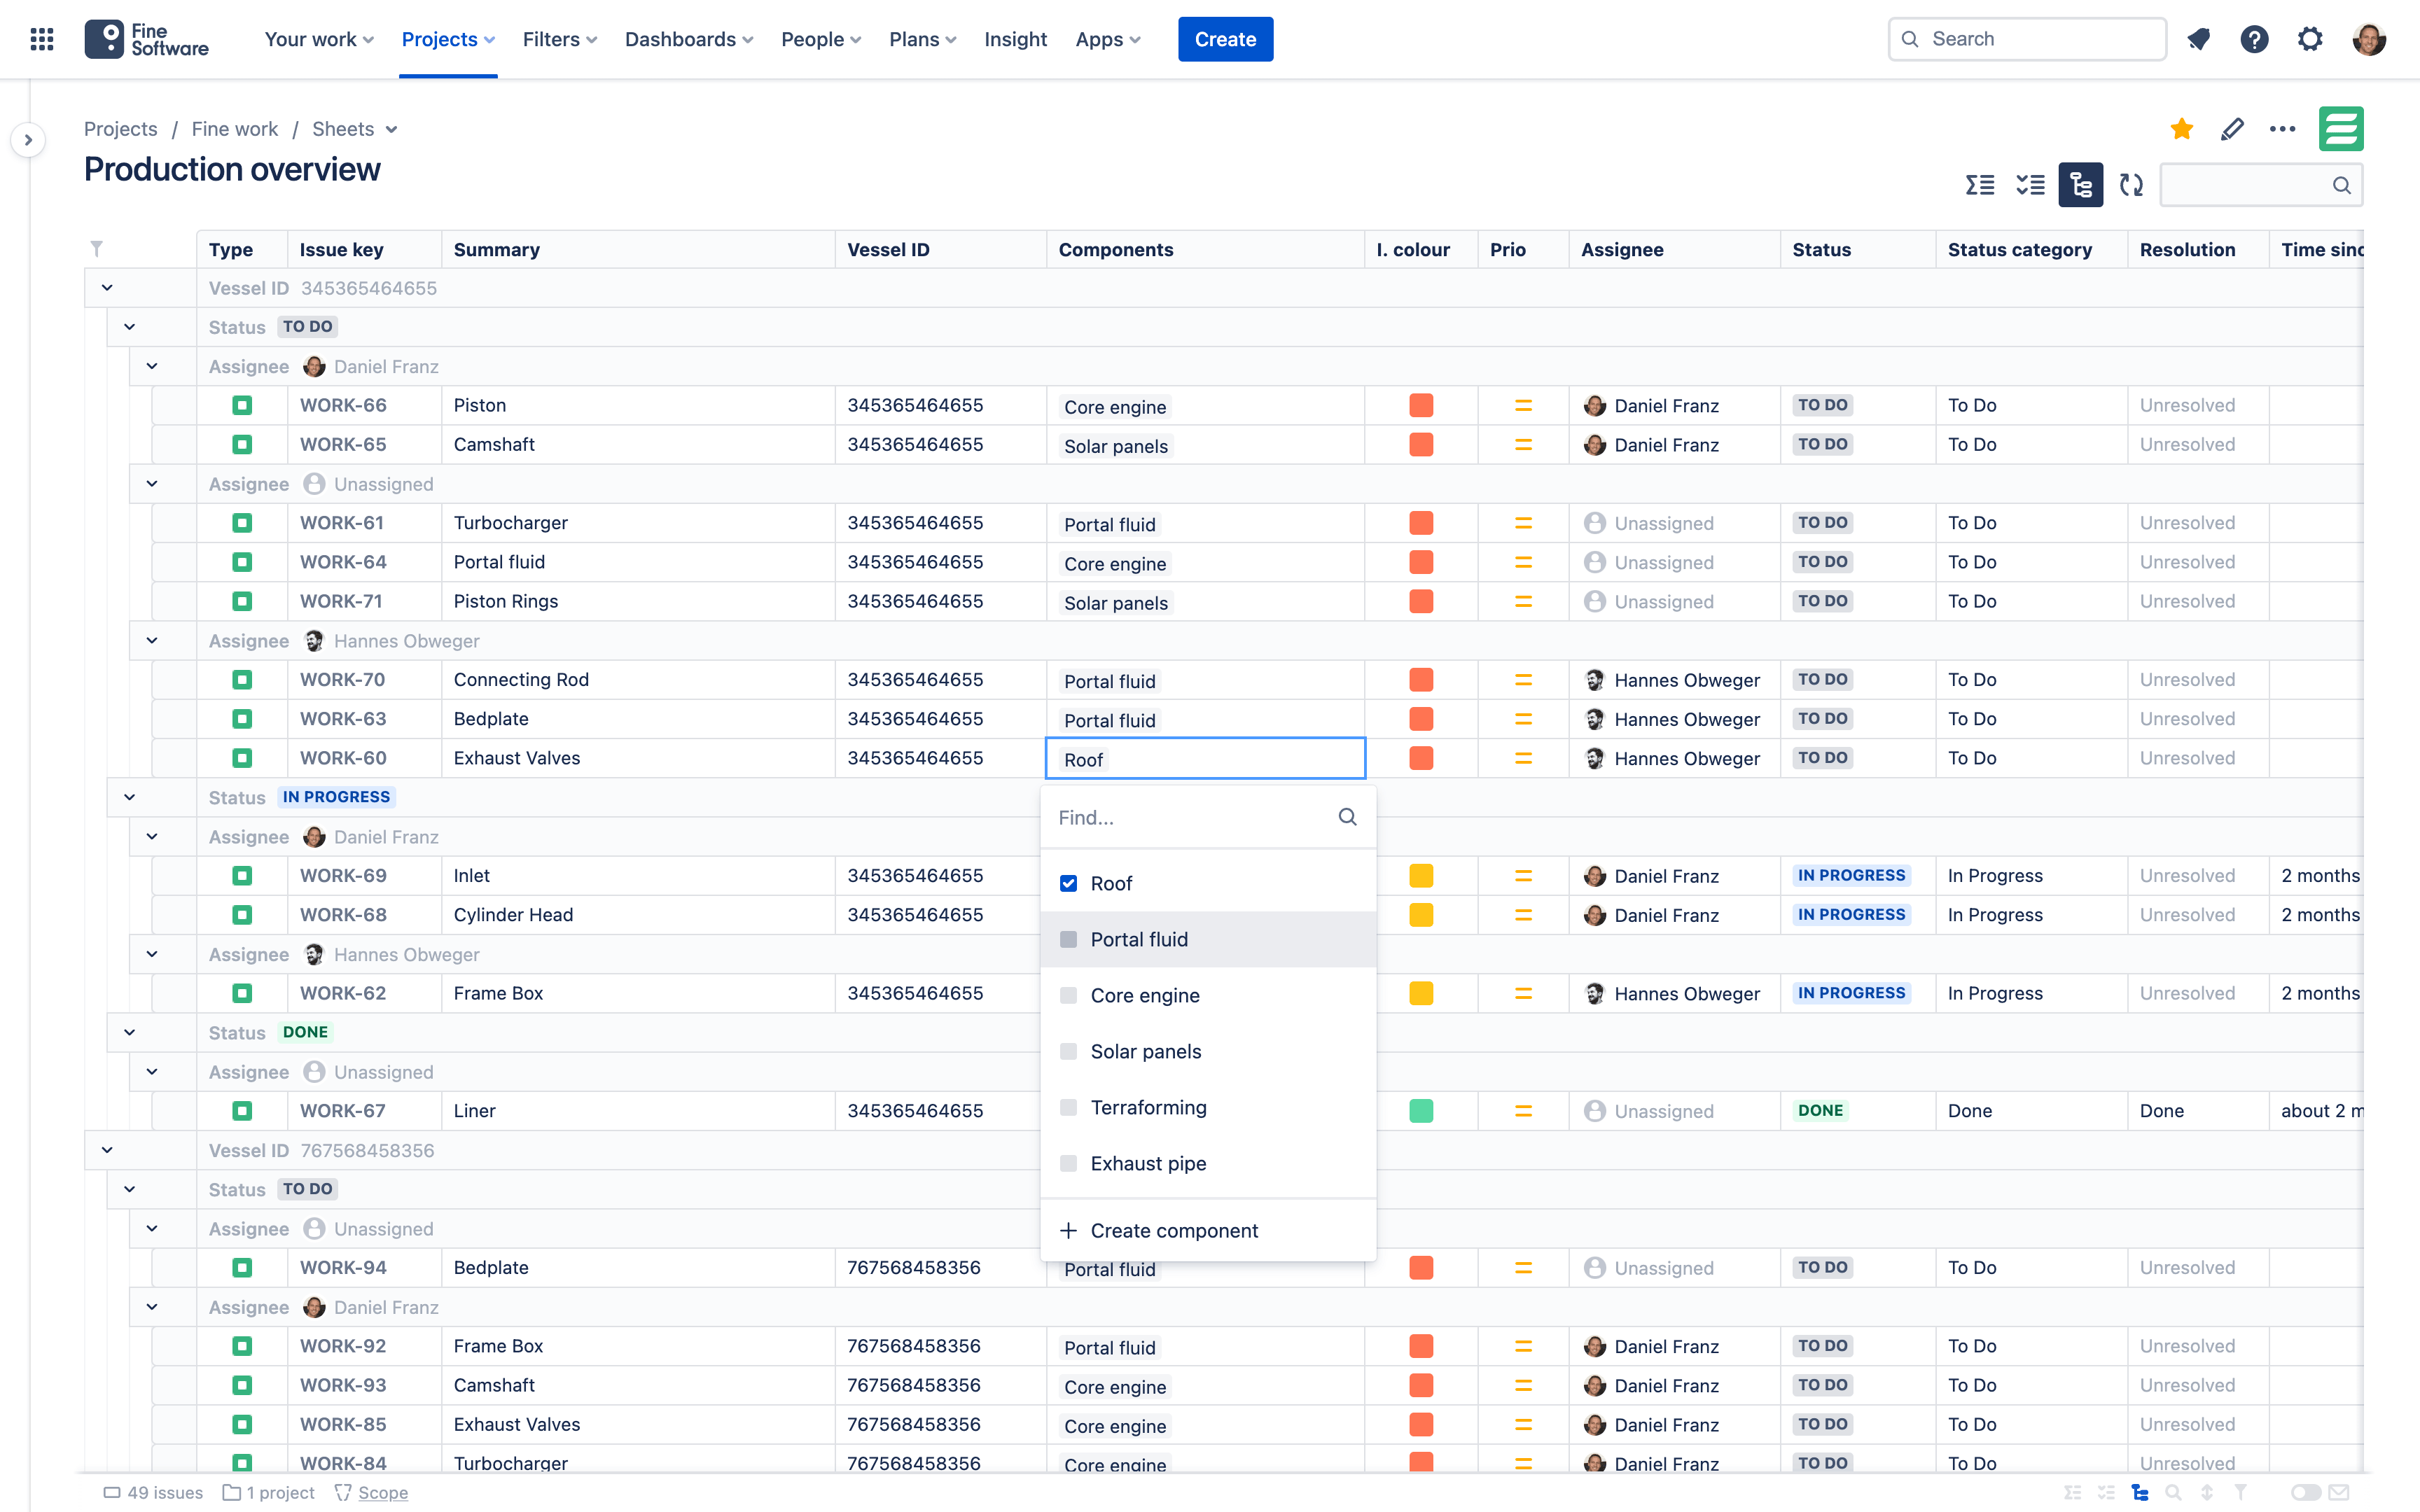
You can view the Field values and other data of your Work items in your Sheets' table cells. To change them, simply double-click on any cell and edit away, like you are used to from products like Microsoft Excel or Google Sheets. Depending on the cell’s data, you can either edit the content directly in the table cell, or in a dropdown menu or dialog that appears.
Screen configuration
Keep in mind: Work types in Jira Cloud are called Issue types in Jira Data Center (opens new window)
While you can add any column to any Sheet in JXL, many table cells will only be available and editable for individual Work types if you have configured Jira accordingly.
You need to have the appropriate Field added to the Work type’s Screen in your
Generally, in order to be permitted to edit Fields of a Work item while it’s on a particular Status, its Workflow properties need to allow for it (Use workflow properties (opens new window)).
Keep in mind: Work types in Jira Cloud are called Issue types in Jira Data Center (opens new window)
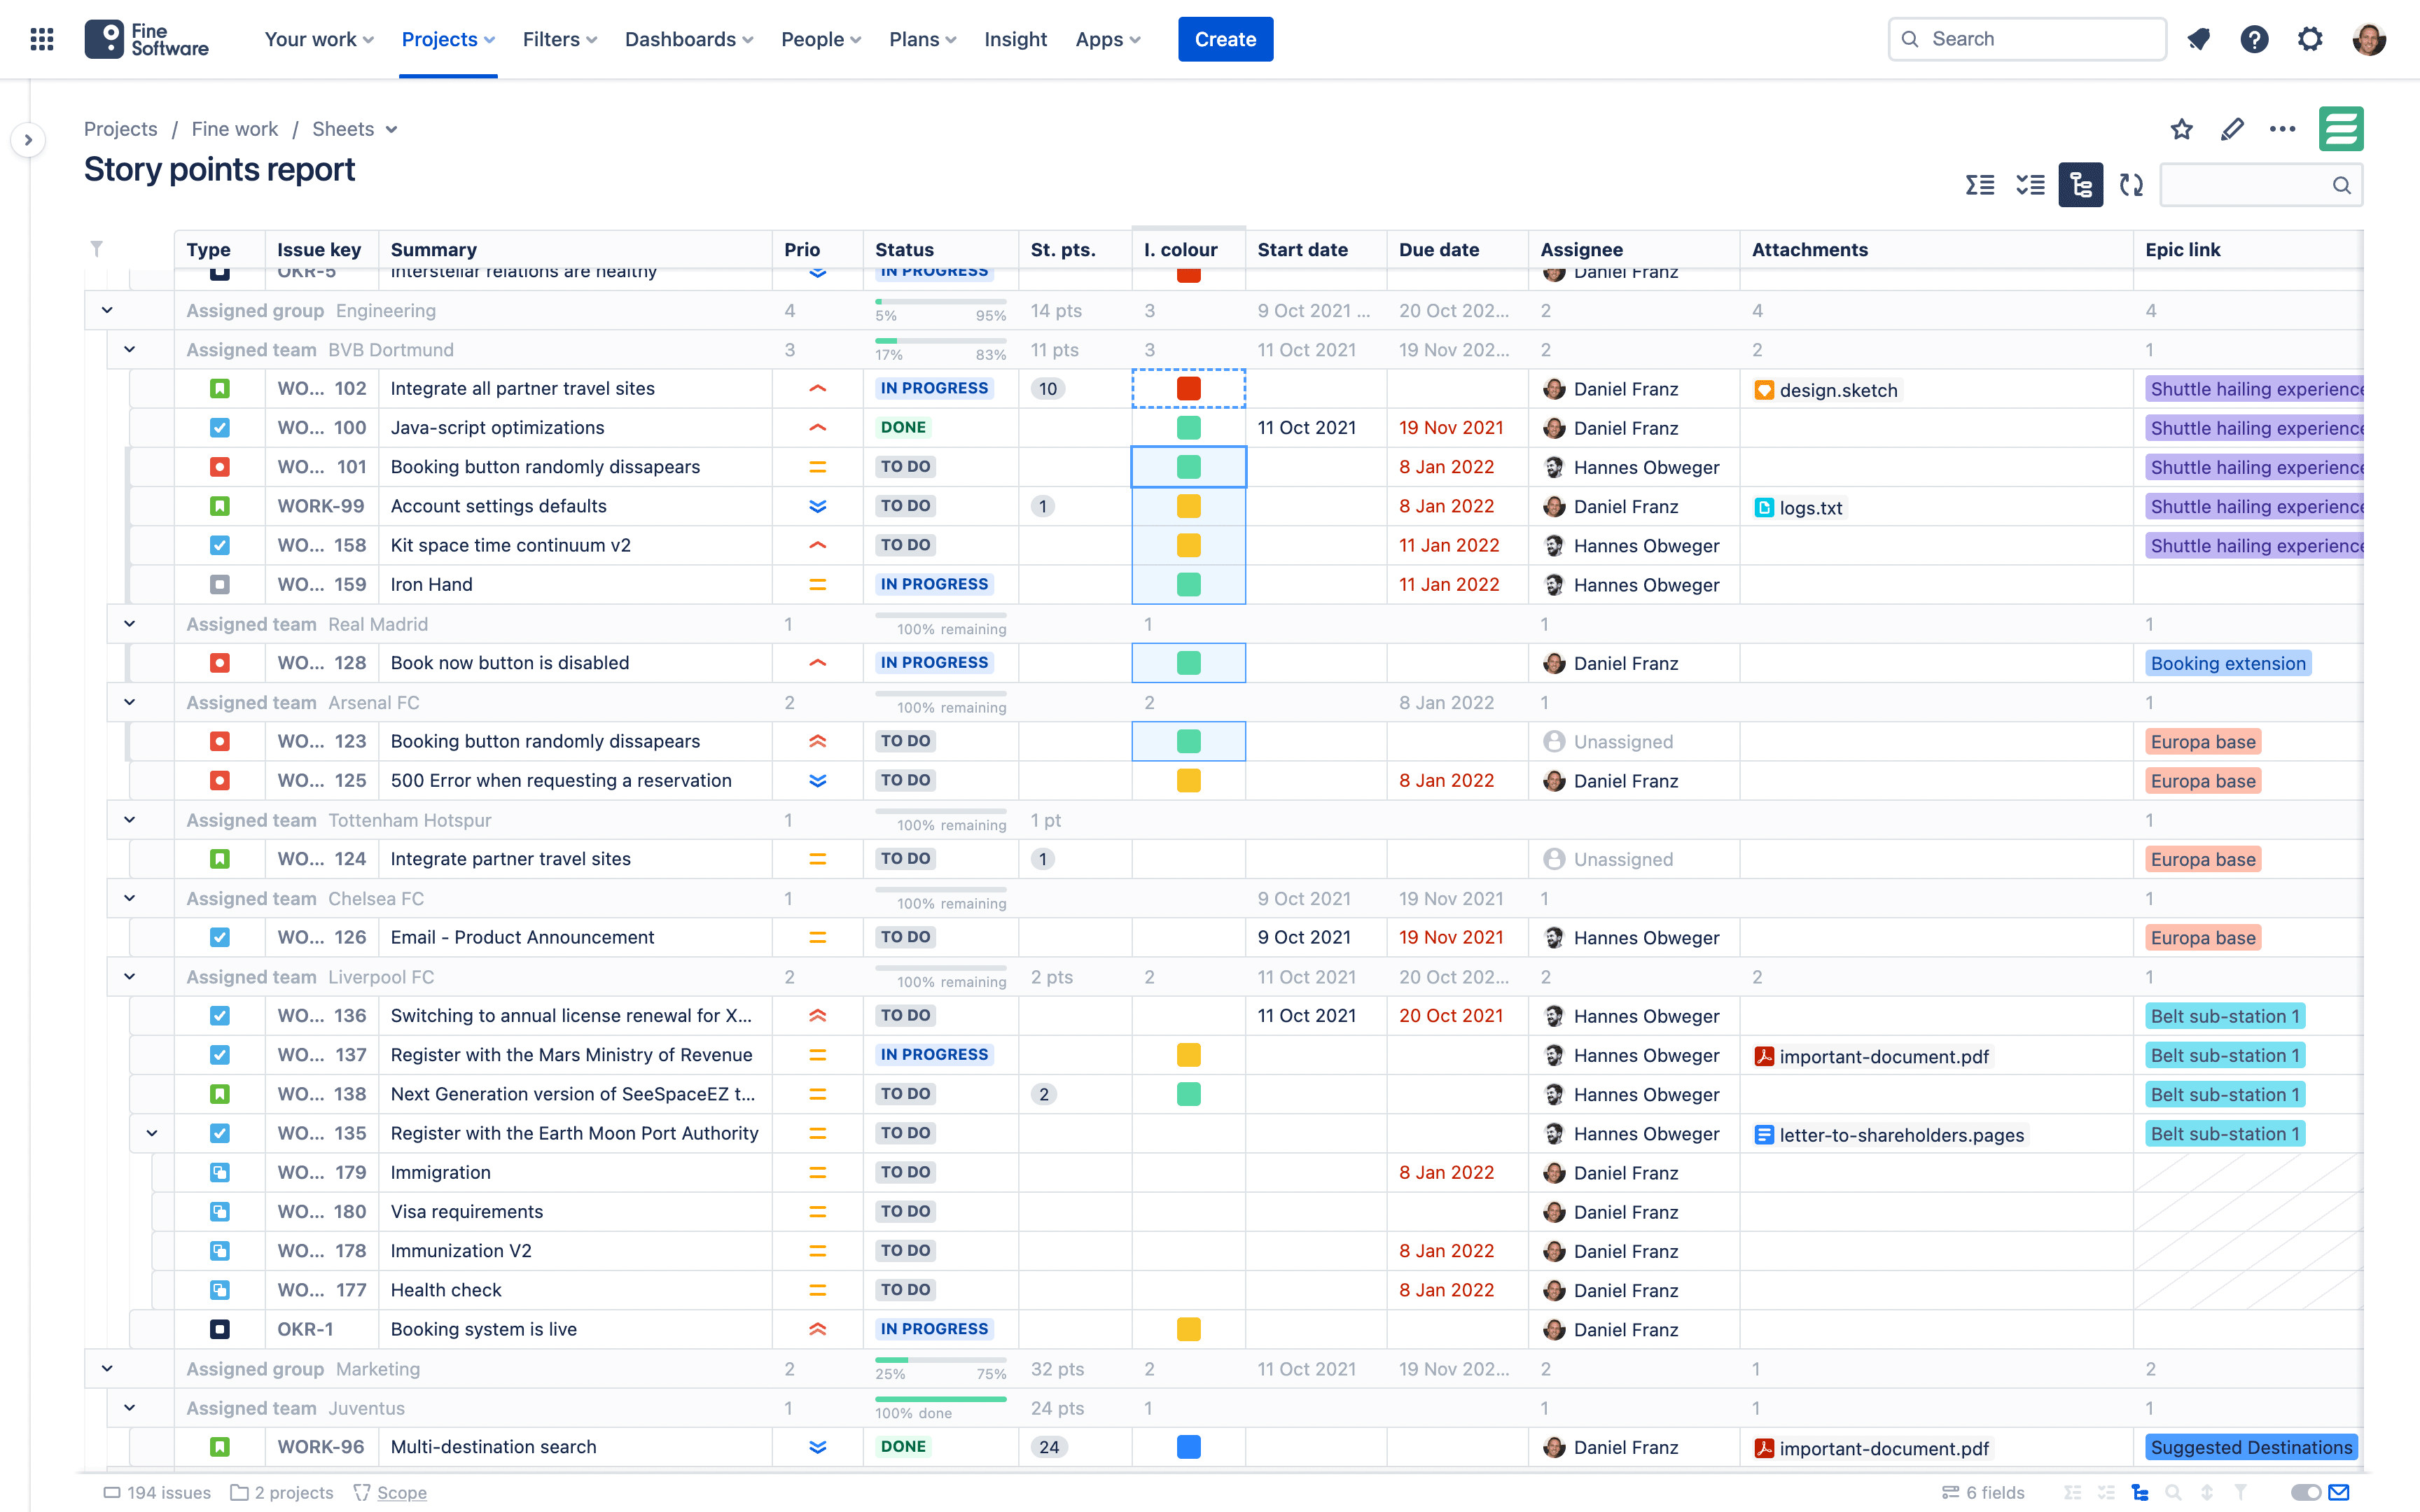
If a cell (i.e. the Field or data it represents) is not available, the cell appears with diagonal stripes and is uneditable. This can have various reasons, e.g.:
- The data is not applicable for the Work type (e.g. Sub-tasks cell of a sub-task).
- The Field is generally not available in the Space type/Project type (e.g. Components cell of a Work item from a Team-managed spaces in Jira Cloud).
- You don’t have sufficient Permissions to view the Field.
- The relevant feature is not enabled in your Jira site.
If a cell (i.e. the Field or data it represents) is not editable, its content appears light grey when selected, and is uneditable. This can have various reasons, e.g.:
- The Field is generally not editable (e.g. the Created date).
- The appropriate Field is not on the Work type’s Screen.
- The appropriate Field is not added to the Work type (Team-managed spaces in Jira Cloud).
- You don’t have sufficient Permissions (e.g. for editing, assigning, closing, transitioning Work items, or managing Sprints).
- Editing the Field type is not yet supported by JXL. In this case, feel free to request this feature with us and we’ll look into it. (Supported fields)
You can undo and redo changes with the usual Keyboard commands.
# Copying and pasting values
Start by selecting the cell or multiple cells of which you want to copy the values. You can then copy and paste the selected cells' values with the usual Keyboard commands.
Keep in mind
The values of different Jira Field types are often incompatible. Examples: You cannot copy the value of an Assignee cell and paste it into an Priority cell. You can, however, in most circumstances copy the value of a Assignee cell and paste it into an Reporter cell, as both have the same or similar enough Field type.
JXL will let you know with a friendly message in case any of your pastes were unsuccessful due to the destination Field/s not accepting the value/s. This can have various reasons, e.g.:
- The pasted content is incompatible with the destination Field type.
- The pasted content is compatible but mismatches all the destination Field’s available options.
- The pasted content is an unallowed value (e.g. non-existent Transitions between specific Statuses of the Workflow)
- You don’t have sufficient Permissions to update the destination Field/s.
You can undo and redo changes with the usual Keyboard commands.
# Bulk editing work items
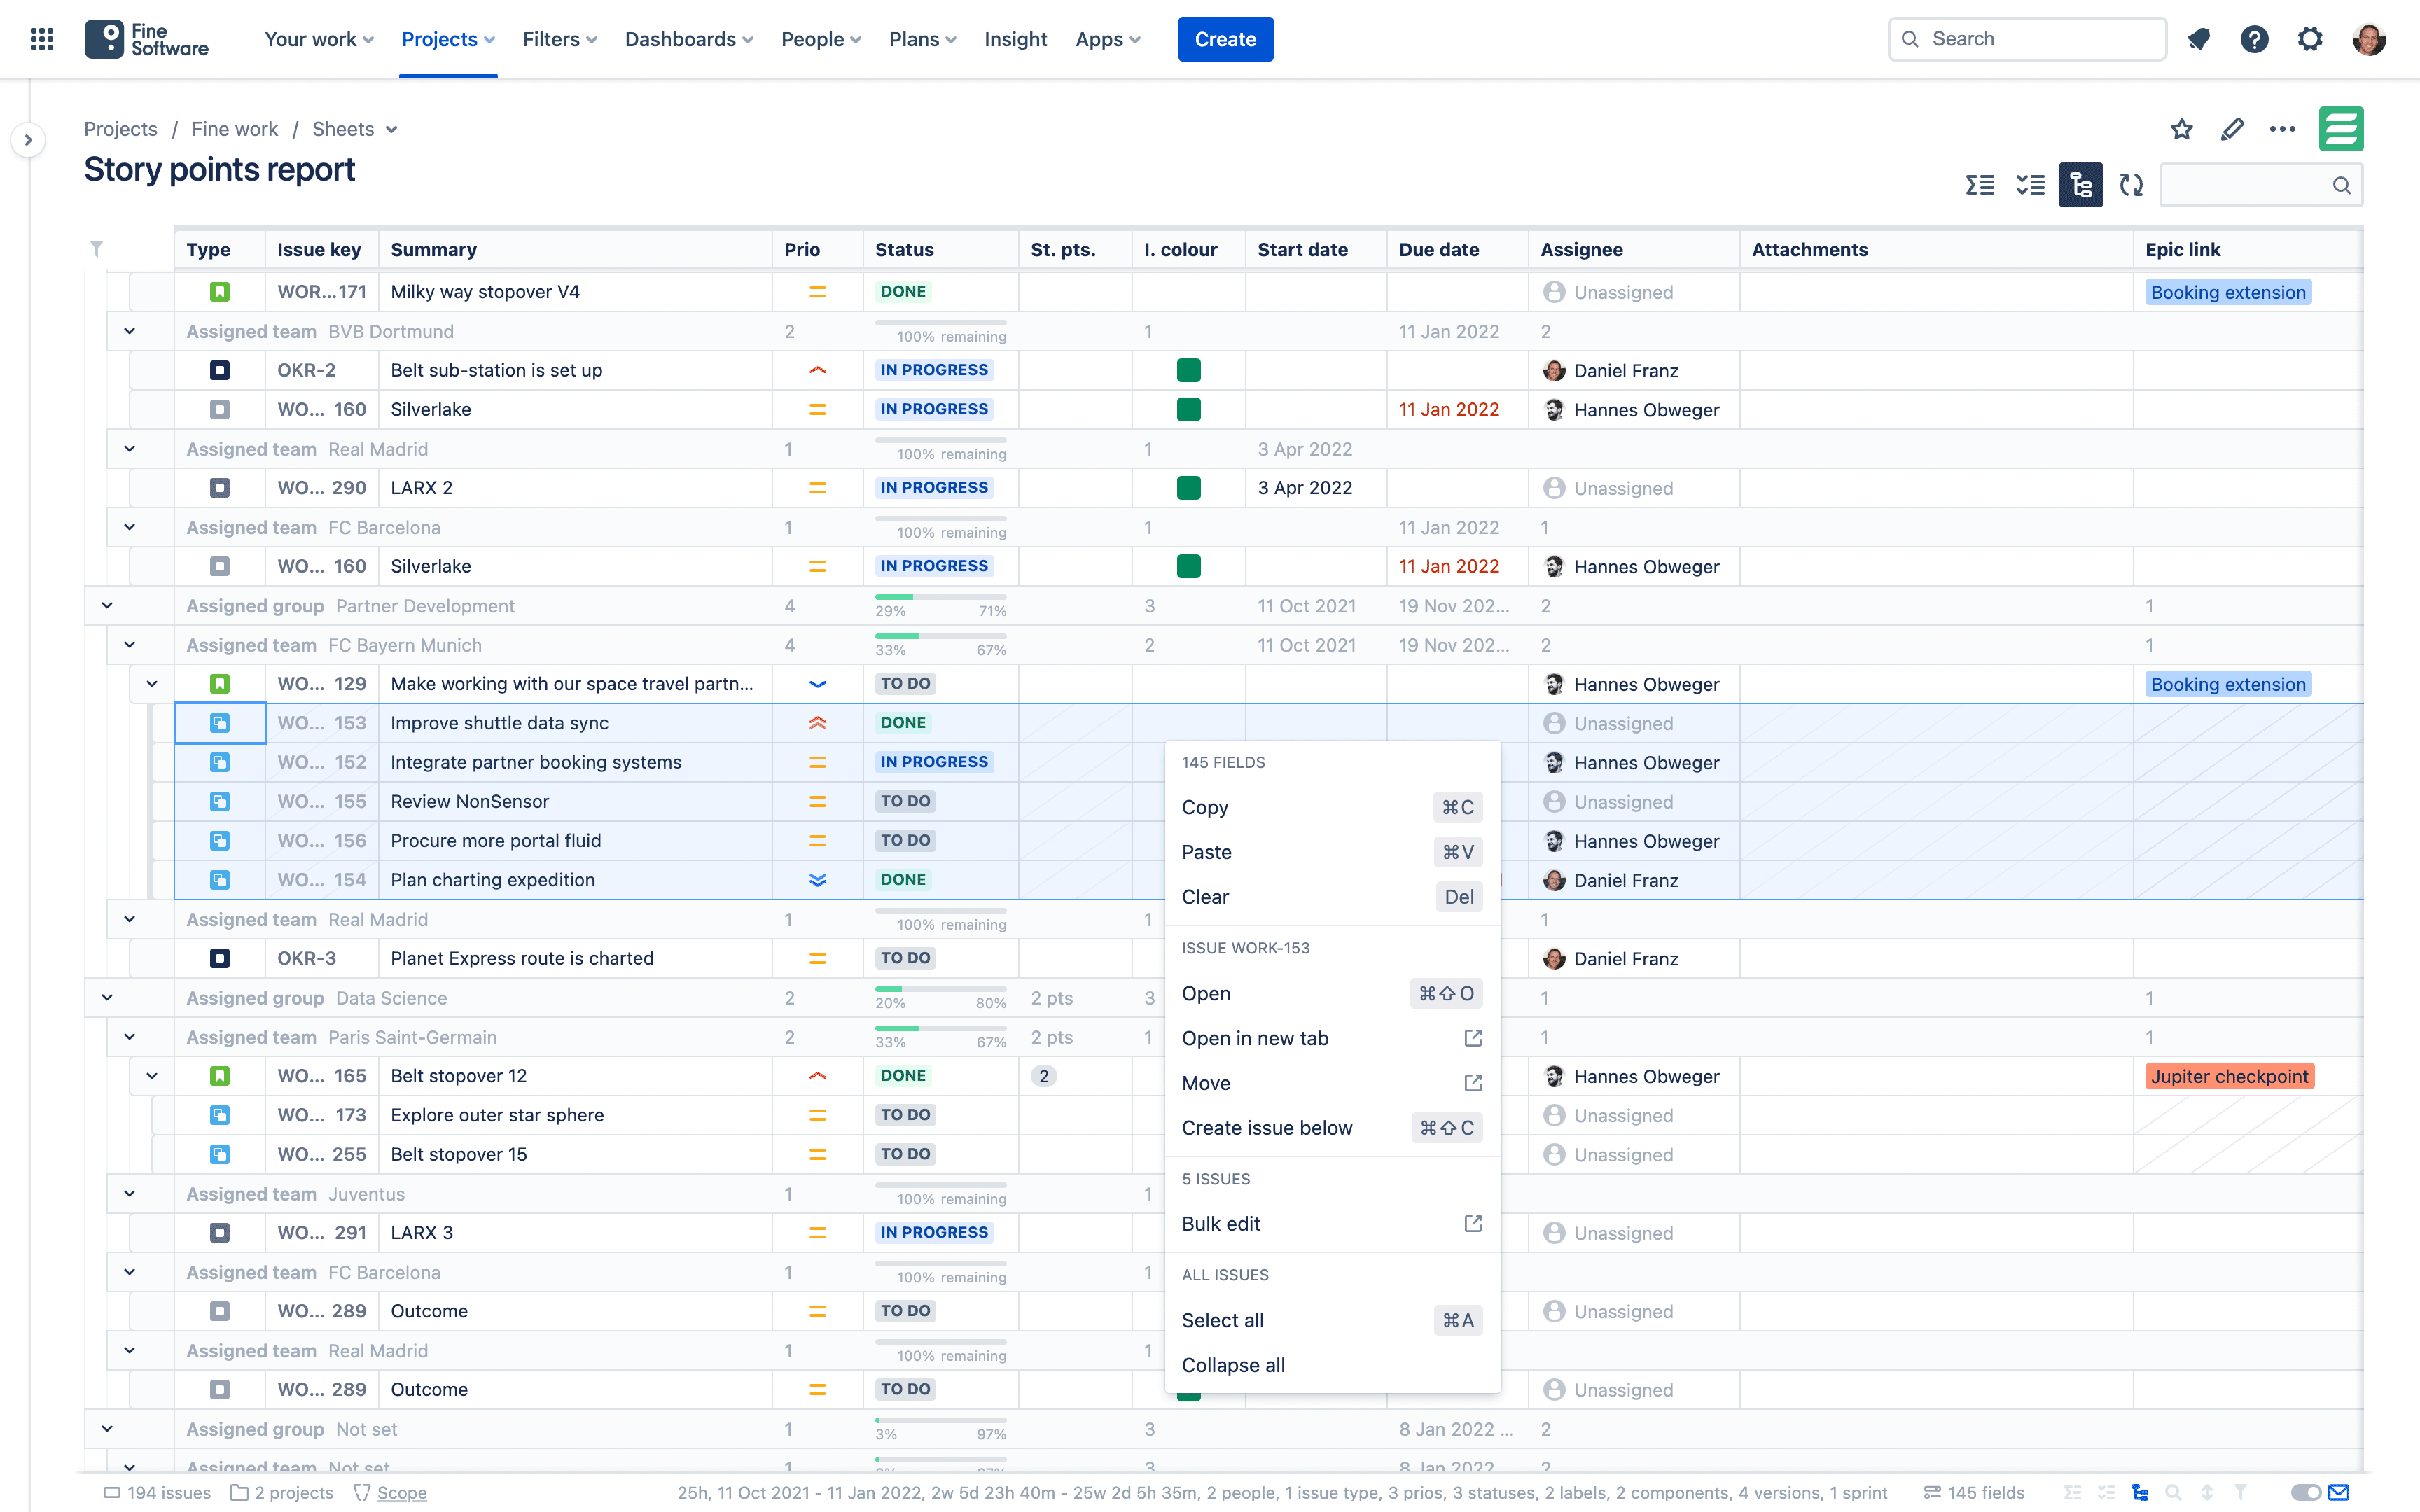
As described above, with the right sheet scope, and by selecting, copying and pasting hundreds or thousands of cells you can get almost any bulk change done.
If you need to take any action or alter any data that aren't represented by Fields you can always just initiate the Jira native bulk editing tool. Select the rows (or just cells of rows) of the Work items you'd like to change, right-click in the selection to open the context menu, and choose Bulk edit. The Jira bulk editing tool opens pre-populated with the Work items from your Sheet.
# Creating work items
To create a Work item in your Sheet, hover with the cursor over the row handles on the left of the table, between the two rows where you want to create the new work item row (i.e. over a row border), and click when the
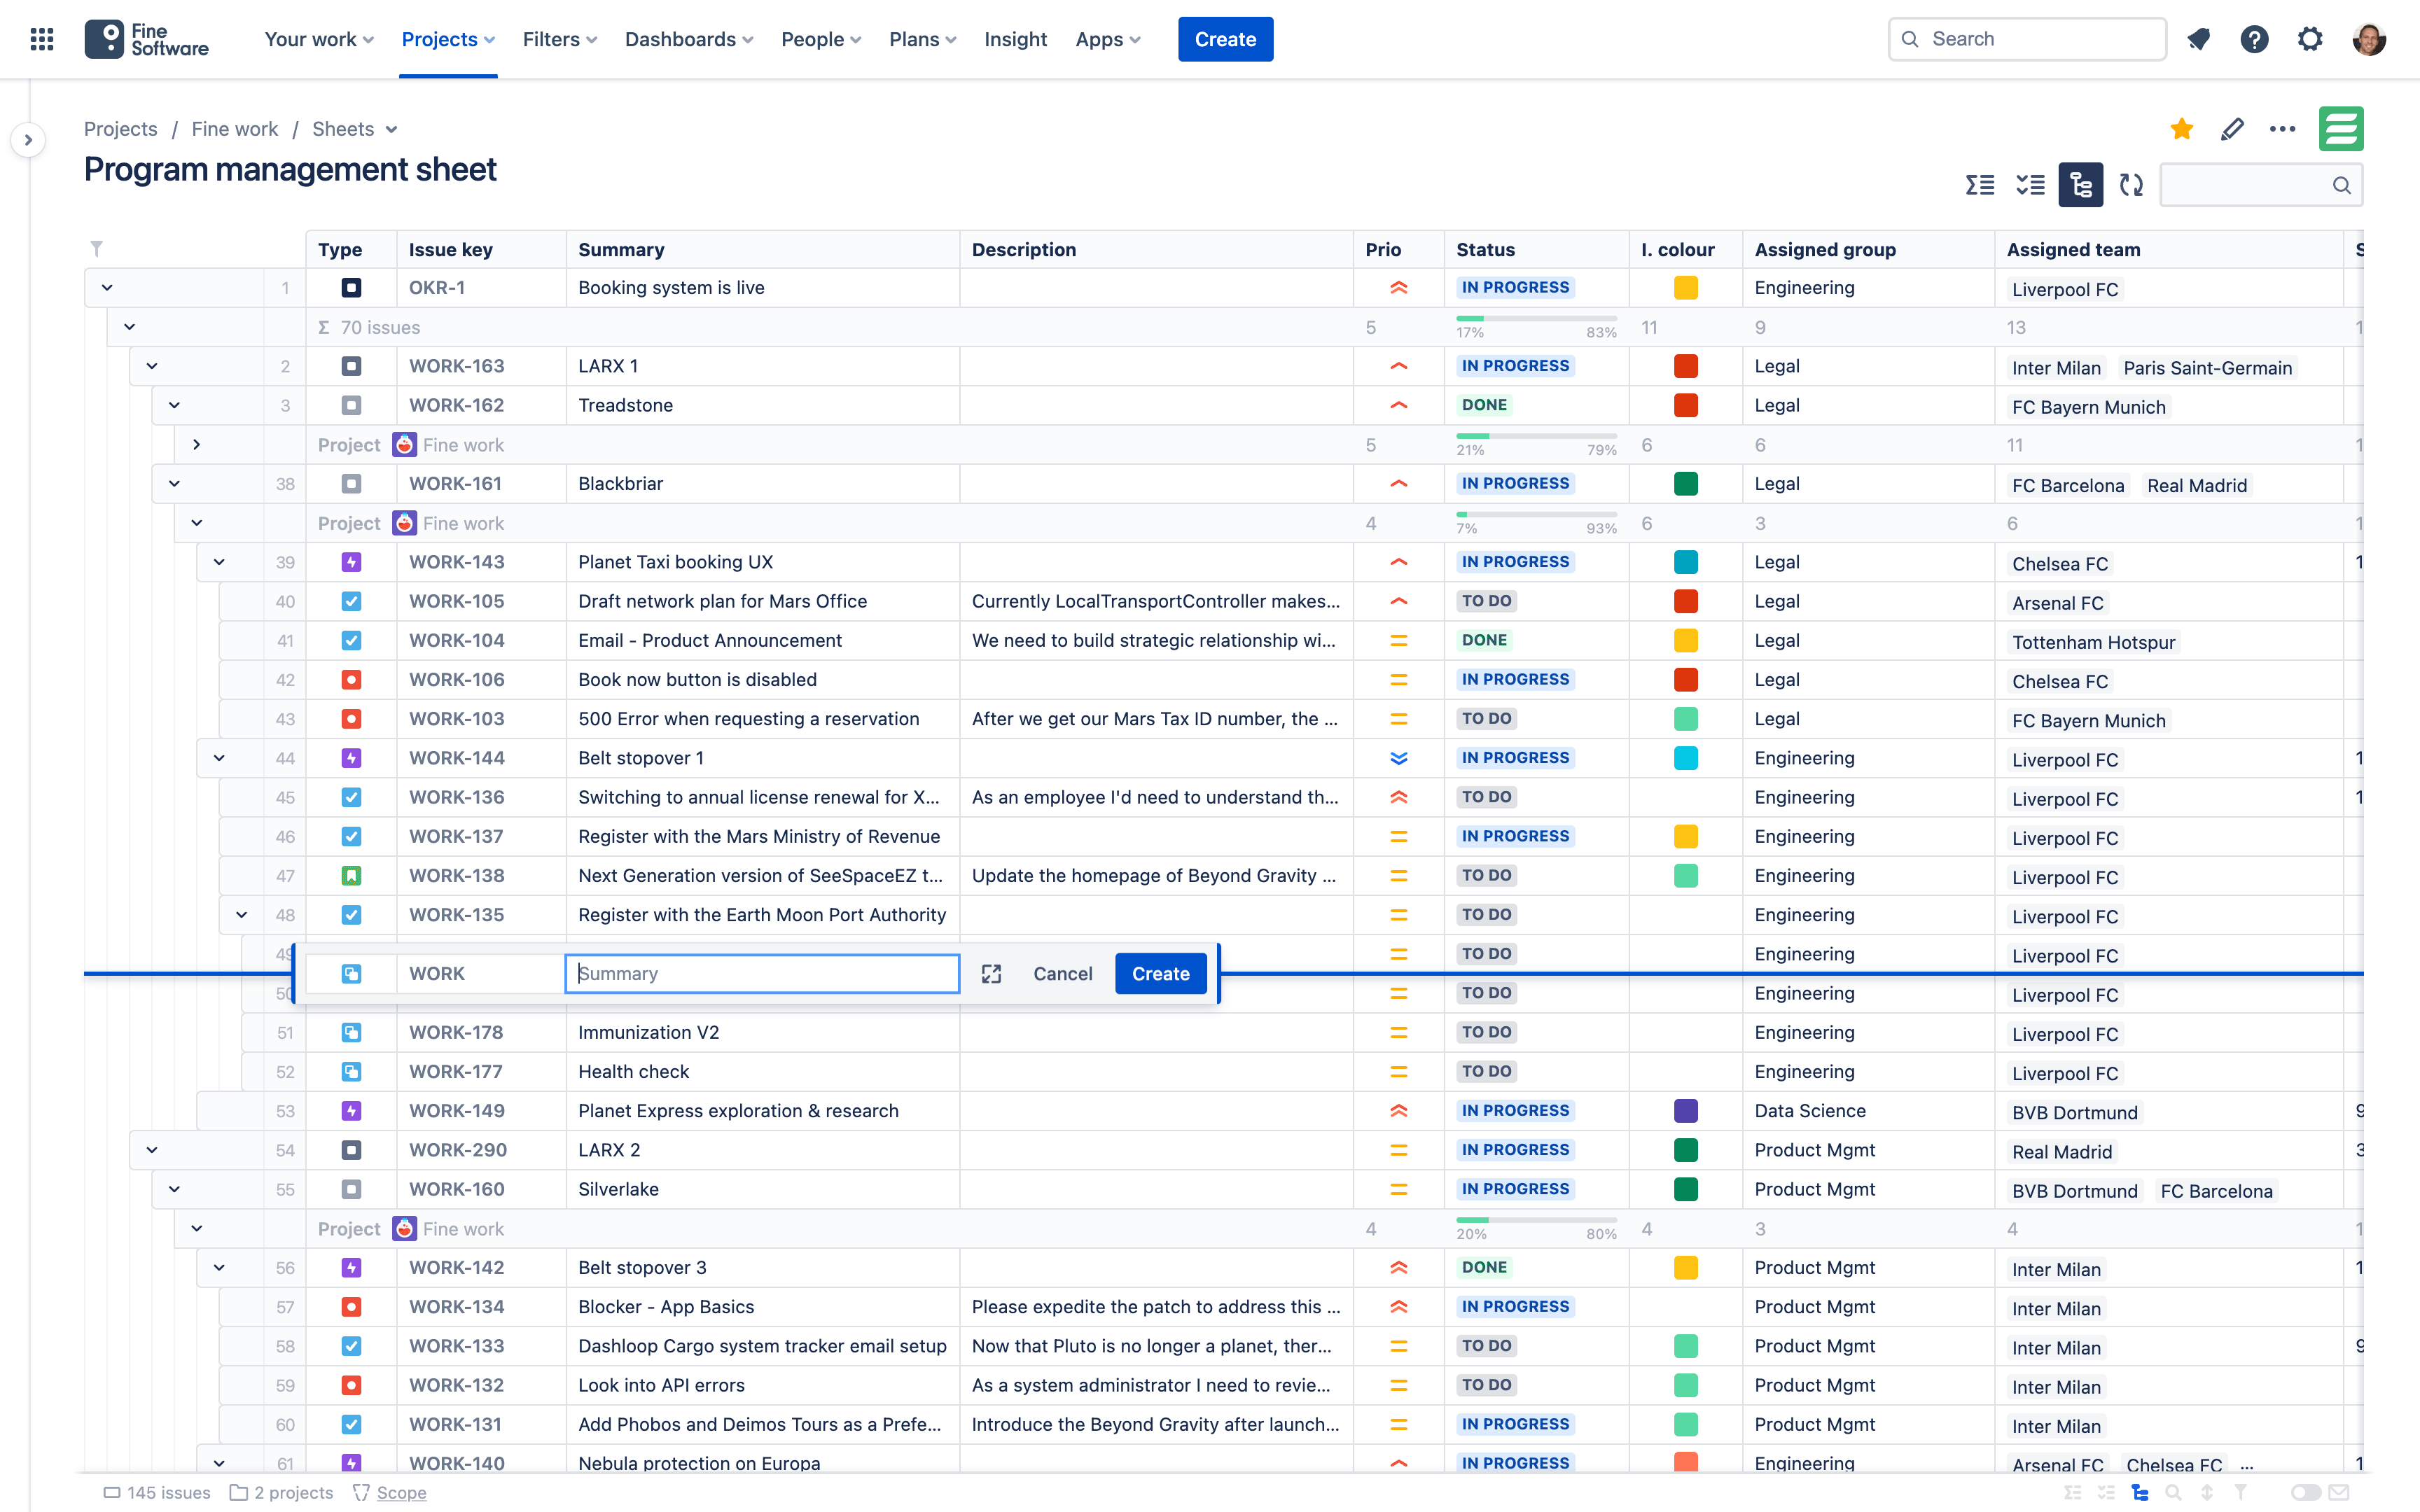
Keep in mind
A new Work item will appear at the position in the table where you created it. However, that position might be temporary. When you re-apply any view preferences (i.e. column sorting, filtering and table searching) that you might have set, the Work item might get listed at a different position in the table. When you refresh the Sheet, the Work item might disappear entirely, if it doesn't satisfy the criteria of the sheet scope.
Screen configuration
Keep in mind: Work types in Jira Cloud are called Issue types in Jira Data Center (opens new window)
When creating a Work item within a Grouping or Hierarchy Level, it will be created with the relevant field values set. E.g. when creating a Work item within an Assignee Grouping, it will get assigned to the User of the Grouping it is being created in. An attempt to create a Work item will fail if you have not configured Jira accordingly.
You need to have the appropriate Fields (in the before-mentioned example, the Assignee Field) added to the Work type’s Screen in your
# Cloning work items
For the purpose of cloning Work items (opens new window), JXL is integrated with the Clone Plus for Jira (opens new window) and Deep Clone for Jira (opens new window) apps. If you have these apps installed, you can select rows (or just cells of rows) of Work items that you'd like to clone, right-click in the selection to open the context menu, and choose More to find their cloning actions.
# Deleting work items
Stay tuned
This feature is not released yet.
# Viewing work item history v4.3.0
To view the history of updates of a Field or a Work item, select the cell or row you're interested in, right-click in the selection to open the context menu, and choose View field history or View work item history. A dialog with a list of past changes opens.